Outcome
You can add one accurate canonical person, choose the correct lead workflow, and understand partial-success messages.
Navigation path
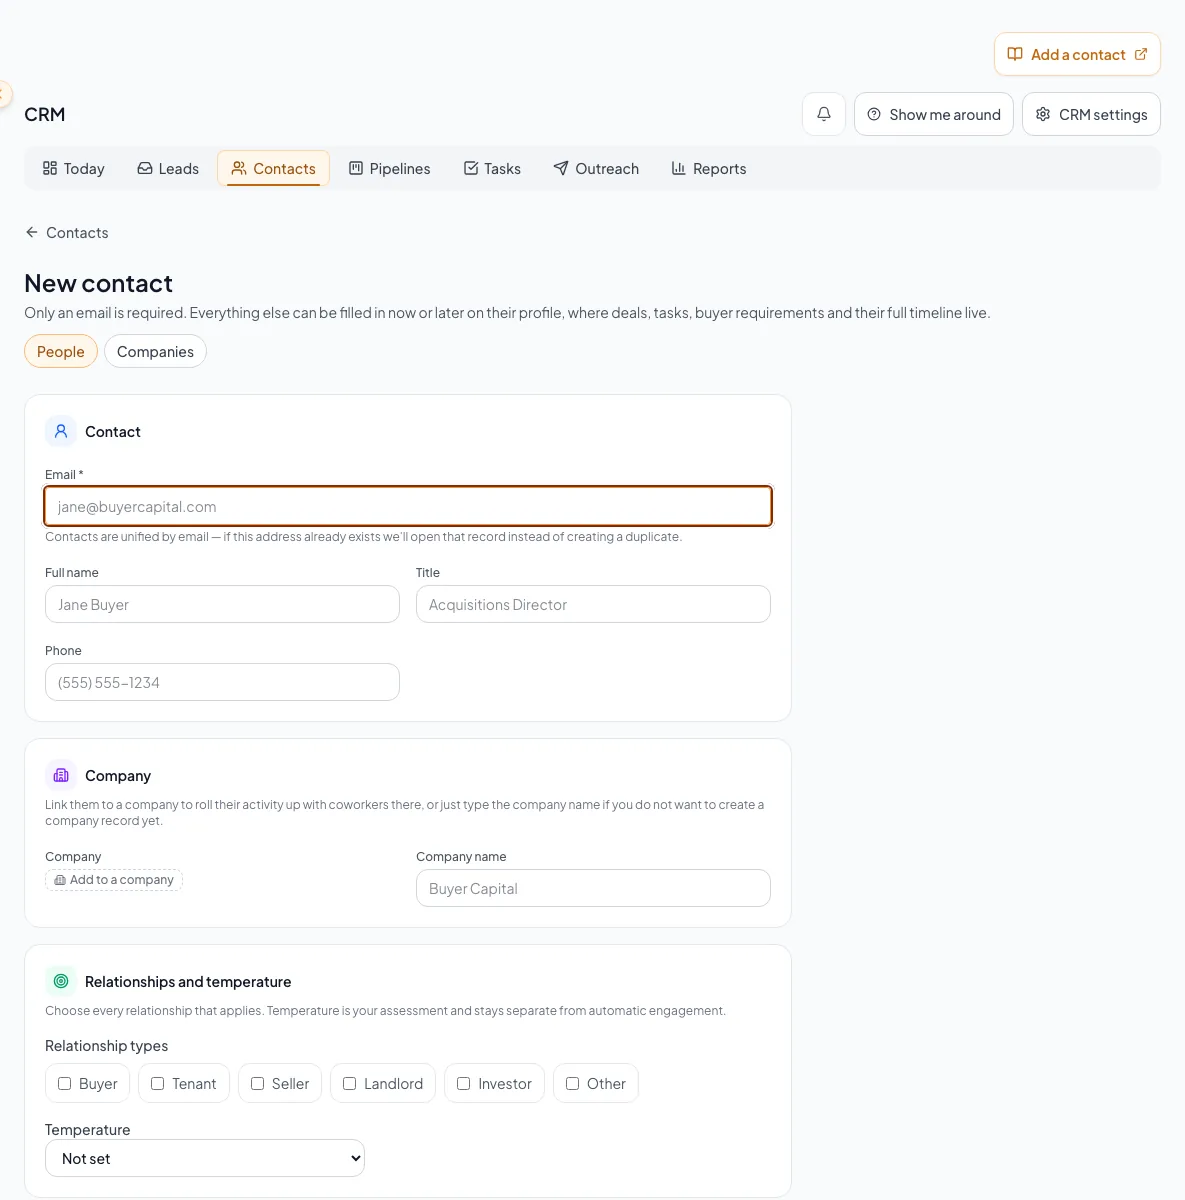
CRM > Contacts > People > Add contact or Add lead
Access
Active CREBuilder subscription with CRM entitlement
On this page
Before you start
Data, sources, and access to prepare
- A valid contact email
- Enough source context to assign relationship types and ownership
Choose Add contact or Add lead
Both paths create or reuse one person
The only workflow difference is whether a manual lead activity marker is added.
Add contact
Add lead
Canonical person by email
One lead_added activity
- Add contactCanonical person by emailcreate or reuse
- Add leadCanonical person by emailcreate or reuse
- Add leadOne lead_added activityadd once
| Use | When |
|---|---|
| Add contact | You need the person in CRM without recording a new lead event. |
| Add lead | A real manual lead arrived and should appear in lead activity. |
Enter identity and company information
| Field | Requirement | What it means | Format | Units | Save behavior | Downstream effect |
|---|---|---|---|---|---|---|
| Required | Canonical identity used to find or create the person | Valid email address | Not applicable | Normalized and stored when Add contact or Add lead completes successfully. | Finds or creates the canonical person and prevents a duplicate email identity. | |
| Name | Recommended | First and last name shown across CRM | Plain text | Not applicable | Stored when Add contact or Add lead completes successfully. | Labels the person across People, Leads, tasks, pipelines, and activity. |
| Title and phone | Optional | Contact context and direct phone | Plain-text title plus formatted phone number | Not applicable | Stored when Add contact or Add lead completes successfully. | Adds professional context and a direct calling channel to the contact. |
| Company | Optional | Existing linked company, a new company, or a loose company name | Selected company or plain text | Not applicable | Stored when Add contact or Add lead completes successfully. | Links or labels the firm used for contact organization and rollups. |
| Relationship types | Recommended | Buyer, Tenant, Seller, Landlord, Investor, or Other; more than one may apply | One or more supported relationship options | Not applicable | Stored when Add contact or Add lead completes successfully. | Controls which requirement panel can appear. |
| Temperature | Optional | Your manual assessment of the relationship | Not set, Cold, Warm, or Hot | Not applicable | Saved with the contact after server confirmation. | Available in Contacts and Leads filters. Automatic Engagement changes do not change this value. |
| Initial note | Optional | Source or qualification context | Plain text | Characters | Created in the timeline after the base contact save succeeds; verify it appears before closing. | Preserves the initial source or qualification context as contact activity. |
Required means the field is needed to complete or support this workflow. Some screens allow a draft to save before every required item is complete. The steps and troubleshooting call out controls the product actively blocks.
- 1
Search the email first
CRM > Contacts > People
Search the exact email address before opening a create form.
Expected result: You know whether a canonical person already exists in your permitted scope.
If this does not happen: If an existing record appears, open and update it instead of creating a variant.
- 2
Open the correct form
People > Add contact, or CRM > Leads > Add lead
Choose the workflow that matches whether a new lead event occurred.
Expected result: The shared person form opens with the correct intent.
If this does not happen: If you chose the wrong entry, cancel before saving and reopen the correct one.
- 3
Enter base details
New contact or lead form
Enter email, identity, company choice, relationship types, and an optional initial note.
Expected result: The form is ready to show any conditional requirements.
If this does not happen: If the company already exists, select it rather than typing a loose duplicate name.
Capture requirements for the selected relationships
| Relationship | Optional requirement fields |
|---|---|
| Buyer or Investor | Label, property types, markets, minimum/maximum SF, minimum/maximum price, minimum cap rate |
| Tenant | Property types, markets, SF range, rent range per SF/year, NNN/FS/MG, term range, target occupancy, minimum TI, must-haves |
| Seller or Landlord | No acquisition or lease requirement panel on this form |
| Other | Use the initial note and add a requirement later if the role becomes clear |
- 1
Choose relationships
New contact or lead form > Relationship types
Select every applicable relationship: Buyer, Seller, Investor, Tenant, Landlord, or Other.
Expected result: The workspace shows the union of relevant sections. Buyer and Investor use acquisition requirements; Tenant uses space requirements and current leases; Seller and Landlord use property opportunities.
If this does not happen: Removing a relationship hides its sections while preserving saved information and active matching or reminders. Open History & saved details to access saved information.
- 2
Enter bounded criteria
Conditional requirement section
Add known property types, markets, ranges, economics, timing, and must-haves.
Expected result: The saved requirement can drive filters and fit scoring.
If this does not happen: Leave unknown fields blank. A false range can exclude otherwise useful matches.
- 3
Verify person identity
New contact or lead form
Compare the email and ownership with the intended person.
Expected result: The form is safe to submit without creating a known duplicate.
If this does not happen: If the email already exists, cancel and open the canonical record.
- 4
Save the person
Form footer > Create contact or Add lead
Select the create action once.
Expected result: CREBuilder opens the canonical contact. Add Lead also records one manual lead event.
If this does not happen: If the existing canonical record opens, review it before adding new data.
Verify base save and optional follow-up data
The form opens an existing person
Likely cause: The normalized email already belongs to a canonical contact, possibly archived.
- Review the existing record and owner.
- Confirm whether manual Add Lead added the lead marker.
- Update the existing person if authorized.
- Do not vary the email casing or add aliases to force a duplicate.
The contact saved but the note or requirement did not
Likely cause: Optional note and requirement writes occur after the base contact and can fail independently.
- Read the toast carefully.
- Open the new contact workspace.
- Add only the missing note or requirement.
- Do not recreate the person.
You cannot select a teammate as owner
Likely cause: Ownership choices are role and company scoped.
- Save under a permitted owner if appropriate.
- Ask a company-wide authorized user to transfer ownership.
- Do not create the record in another company context.
Final check
- Email matches the real person.
- No duplicate canonical contact was created.
- Company link is correct.
- Relationship types and manual temperature reflect current context.
- Ranges use consistent units.
- Initial note and requirement are visible.