Video walkthrough
Read the written stepsRead the transcript
Before you watch
- Have a Retail OM open with the Modern template selected, plus the property-facts reference sheet.
- The practice address is fictional and will not geocode. Its separate illustrative map pin is not a verified subject location.
Outcome
Enter each fact once, in the right section, and watch it flow to every page that uses it.
Navigation path
Documents > Open document > Document Wizard
Access
Editing requires access to the document. Visible sections depend on package, property type, template, and role.
On this page
Before you start
Data, sources, and access to prepare
- Access to the document
- The source document for the facts you are entering
Prepare these details
- Identify the exact fact or section to change
- Confirm its source and unit
- Know whether the change applies to one building or the whole document
Complete the task
- 1
Open the document
Documents
Select the intended document row.
Expected result: The document wizard opens with the saved draft.
If this step does not work
Compare the property address and package before editing if similarly named documents exist.
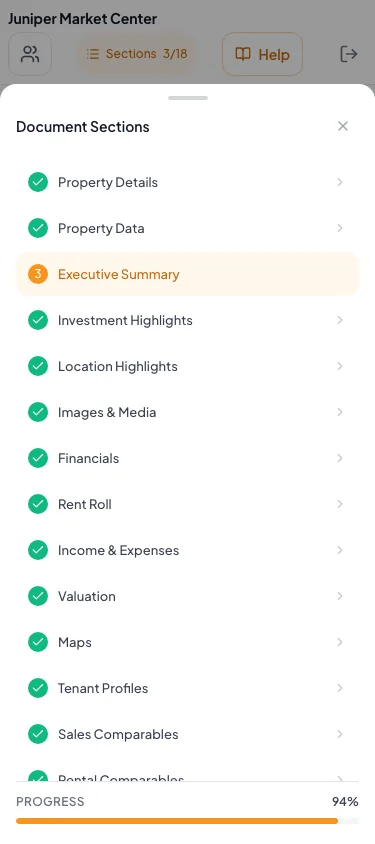
Use Sections to switch between document sections on a phone. - 2
Open the source section
Document Wizard navigation
Select the section that owns the value from Document Sections or the Sections drawer.
Expected result: The relevant form or editor appears with the same document progress.
If this step does not work
Use Review & Customize to identify the source section when the final page name differs.
- 3
Edit one field
Selected wizard section
Change the field using the value from your source document.
Expected result: The field shows the new value and any calculation updates.
If this step does not work
Restore the prior value if the unit, meaning, or source is uncertain.
- 4
Resolve displayed validation
Selected wizard section
Correct the field named by the validation message.
Expected result: The validation message clears.
If this step does not work
Check the required format and property-type behavior in the field reference.
- 5
Confirm the save state
Wizard header
Wait until the save indicator reports completion.
Expected result: The section is stored before navigation.
If this step does not work
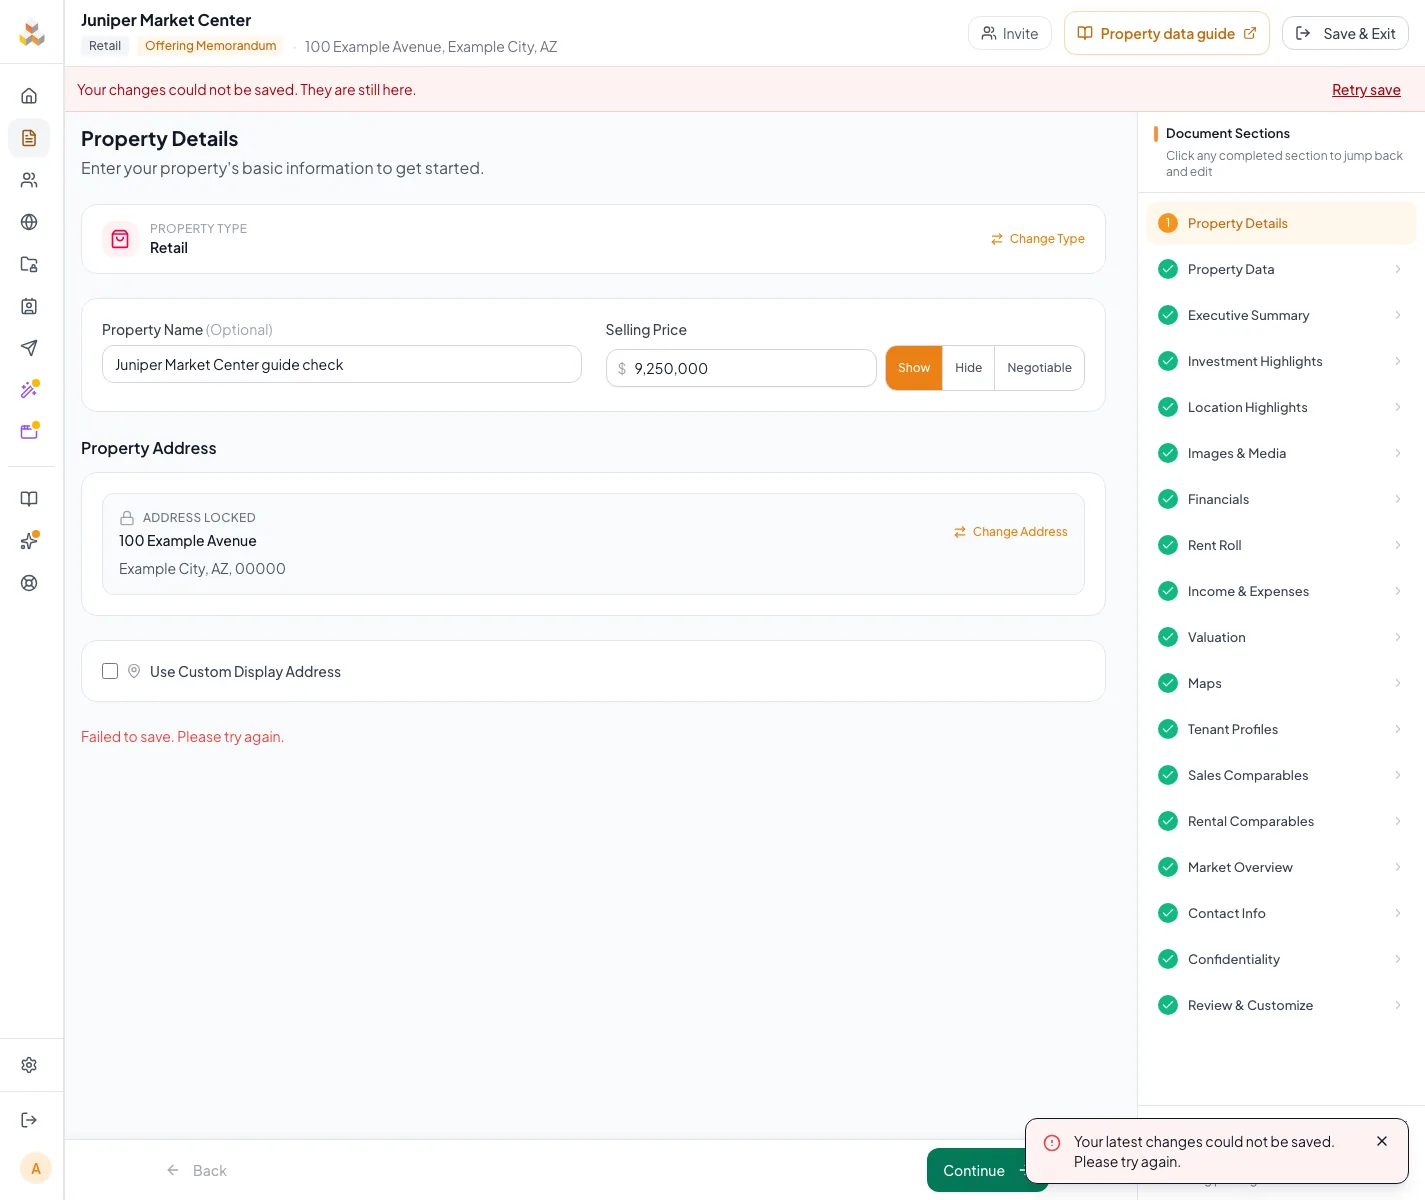
Keep the entered values on screen and use Retry save if saving fails.
- 6
Inspect the output
Review & Customize
Open the page that uses the edited value.
Expected result: The assembled page reflects the saved source data.
If this step does not work
Return to the owning wizard section instead of typing over generated output.
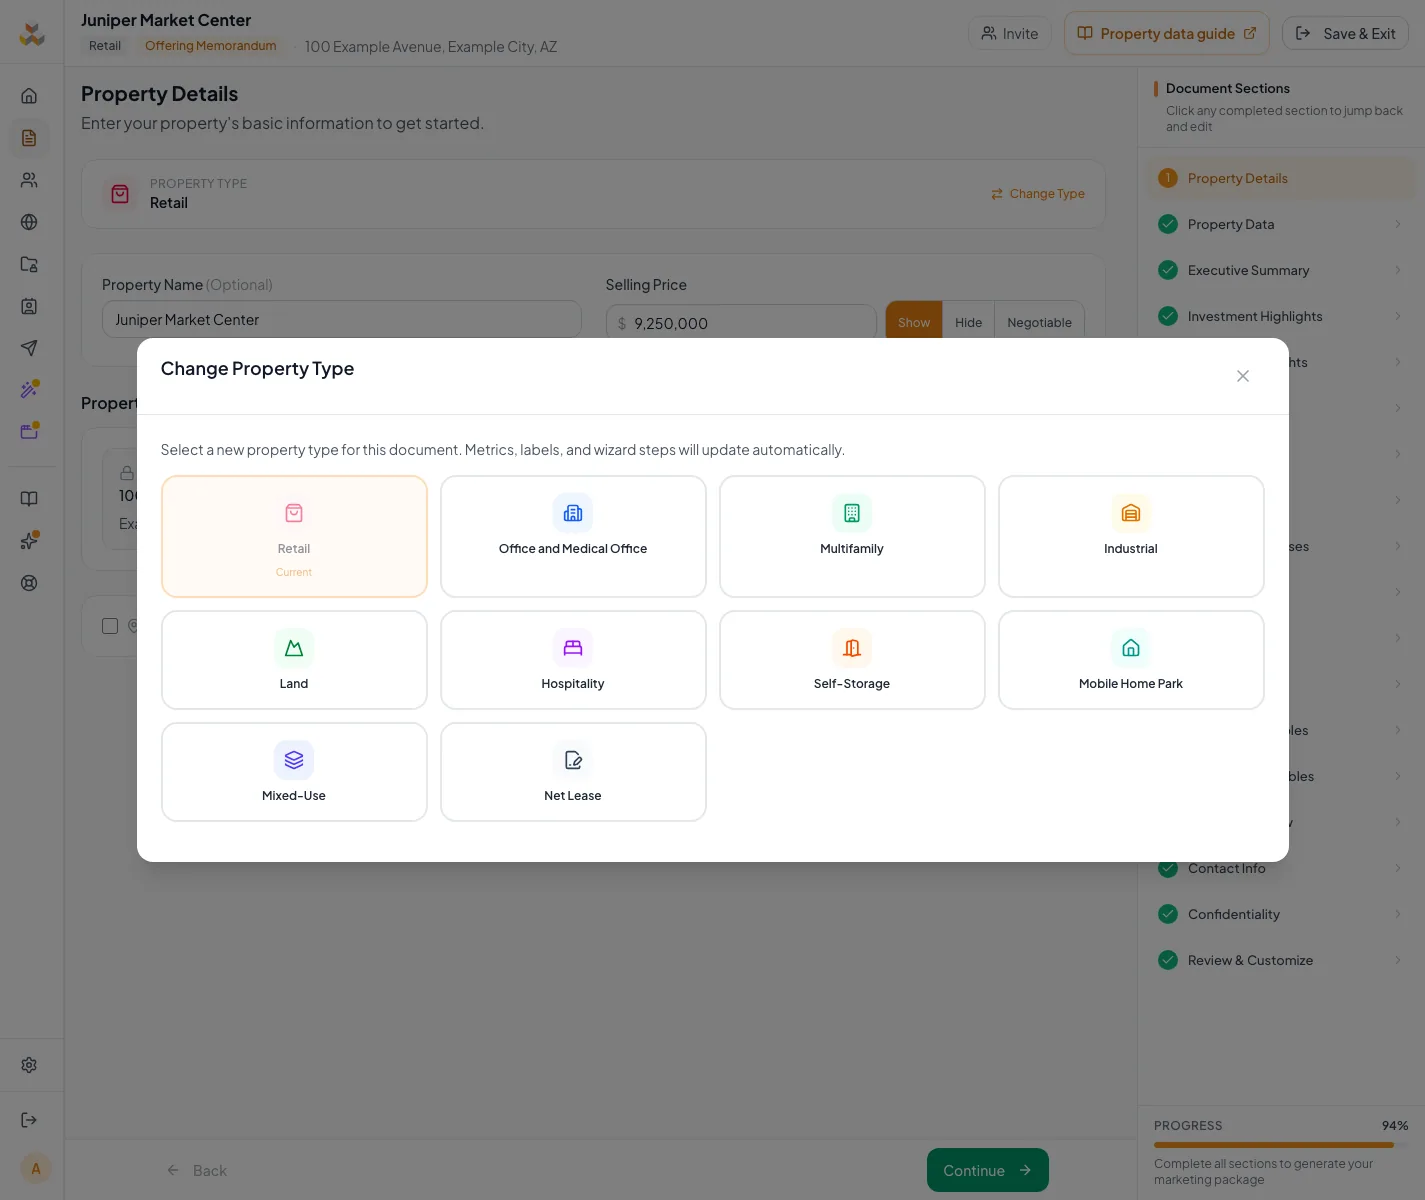
Enter the identity and transaction facts for an OM
Property Details identifies what is being marketed. Property Data holds physical and operating facts. Enter the same source values you intend to use in the narrative and financial analysis. A display address is presentation text; it does not move the subject pin or replace the geocoded address. For the asking price, Show displays the amount. Hide removes the asking price from the document and public CREBuilder listing, including its listing cards. Negotiable displays that label instead of the amount. Choose the display in Property Details > Selling Price, wait for Auto-saved, and refresh the public listing. The stored amount remains available for internal calculations.
- 1
Name the property
Property Details > Property Name
Enter the marketing name in Property Name when the property has one.
Expected result: The name identifies the property across the document.
If this step does not work
Property Name is optional for a single property. Portfolio documents show Portfolio Name instead, which some templates require.
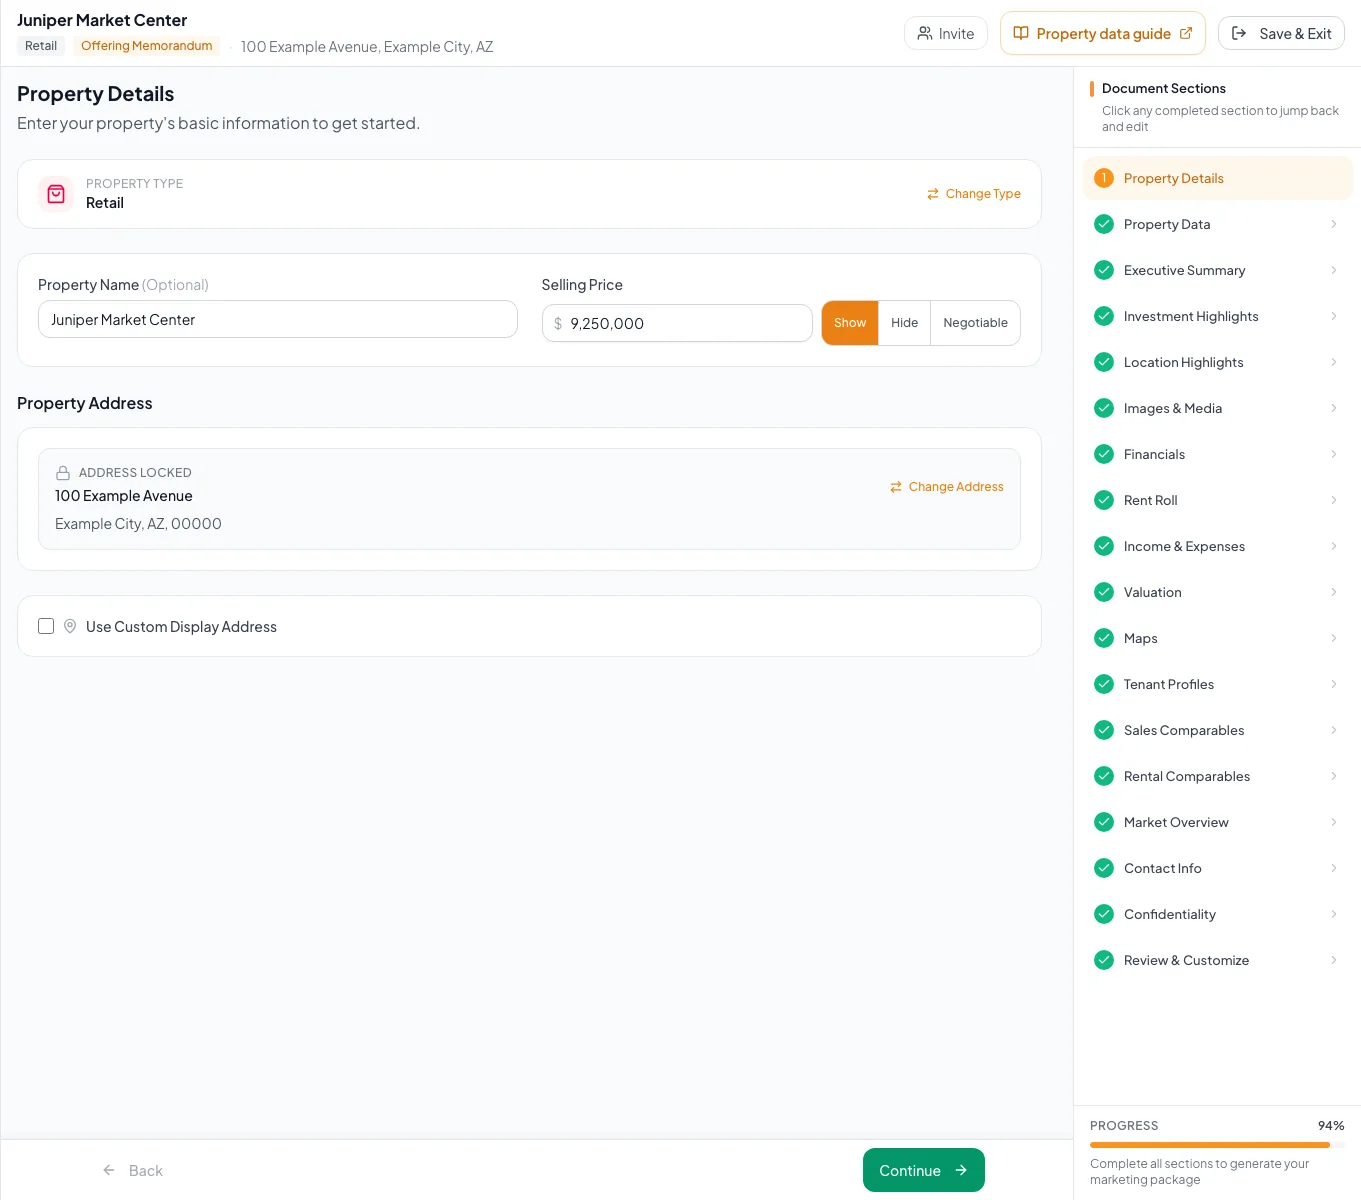
Enter the core property facts in Property Details before moving into narrative, media, financial, and review steps. - 2
Select the subject address
Property Details > Street Address
Select the exact address from the search results when the address is not yet locked.
Expected result: City, State or Province, and ZIP or Postal Code identify the intended subject.
If this step does not work
Use Change Address for a saved locked address; review its impact before confirming a different property.
- 3
Enter the sale price
Property Details > Selling Price
Enter the asking price when Selling Price is shown.
Expected result: The amount is available to the document and its price-based metrics.
If this step does not work
Choose the displayed Hide or Negotiable option when the assignment requires that presentation instead of a printed price.
- 4
Save the property details
Wizard footer
Select Continue after reviewing the identity and transaction fields.
Expected result: The current property details save before the wizard advances.
If this step does not work
Remain on the section when a validation, price reminder, or save error requires a response.
- 5
Open the physical facts
Document Sections or Sections drawer
Select Property Data.
Expected result: The fields match the selected property type; a multi-property document identifies the current building.
If this step does not work
Use the Property Types guide if the expected area, unit, room, pad, or component fields are missing.
- 6
Enter one physical fact
Property Data > relevant field
Enter the source value using the unit printed beside that field.
Expected result: The field reflects a factual area, count, year, or property characteristic.
If this step does not work
Leave unsupported optional information blank rather than substituting a guessed zero or an unrelated metric.
- 7
Verify the saved facts
Review & Customize > property summary
Compare the assembled property facts with your source files.
Expected result: Name, address, price, area, and inventory counts agree with the assignment.
If this step does not work
Correct the owning Property Details or Property Data field if any repeated value differs.
Property-specific fields
List available spaces for a Leasing Package or For Lease Flyer
Leasing Packages and For Lease Flyers include a Space Available section. Add each suite once with its size, rate, and terms, and it appears on the Space Available page of your document. Saved spaces keep the order you set.
- 1
Open Space Available
Document Sections or Sections drawer
Select Space Available.
Expected result: Available Spaces lists your saved spaces, or shows No spaces added yet.
If this step does not work
Space Available appears only in Leasing Packages and For Lease Flyers.
- 2
Add a space
Available Spaces
Select Add Space.
Expected result: The Add Space dialog opens.
If this step does not work
Scroll below the last space card when the list is long.
- 3
Describe the space
Add Space dialog
Enter the Space / Suite #, Lease Use, Square Footage Available, Rent Rate, Lease Type, and Lease Term (Years) you want to advertise.
Expected result: The dialog shows the details for this suite.
If this step does not work
Select Range beside a field to enter a from-to value. Select Negotiable beside Rent Rate to advertise the rate as negotiable.
- 4
Set the possession timing
Add Space > When can a tenant take possession?
Select Available now or Available on a future date.
Expected result: A future date shows a Possession date field.
If this step does not work
The possession date must be after today; Choose a future date appears until it is.
- 5
Save the space
Add Space dialog
Select Add Space.
Expected result: The dialog closes and the space card appears in Available Spaces.
If this step does not work
Add Space stays unavailable until a future possession date is set for a future-date space.
- 6
Order the spaces
Available Spaces
Drag a space card to its new position.
Expected result: The list shows the new order.
If this step does not work
Use Move up or Move down on the card when dragging is difficult. To change a space later, open it from its card and select Update Space.
Check the finished page
Common structured fields
On wide screens, Document Sections stays beside the editor. On smaller screens, select Sections to open the same navigation and see the current step count. Available sections still depend on document type, property type, template and financial scope.
Desktop Document preview opens by default and remembers Show preview or Hide preview. On tablets and phones, select Preview to open it when needed. Closing a preview or helper drawer leaves the draft in place. Use the main page scroll to reach lower fields; wide tables keep their own horizontal scroll.
Verify meaning and units before entry
Address Required
The property location used on the cover, maps, and listing
- Format
- Address selected from the search results
- Units
- Not applicable
- Save behavior
- Select the exact search result in Property Details; it saves with that section.
- Downstream effect
- Changing it can affect maps, demographics, and the public listing.
Property Name Optional
The marketing name used in headings and the public listing
- Format
- Plain text
- Units
- Not applicable
- Save behavior
- Saves automatically in Property Details. Portfolio documents use Portfolio Name, which some templates require.
- Downstream effect
- Changing it updates every page and listing that shows the name.
Building area Recommended
The property area in the unit shown for your property type
- Format
- Number in the property-type field
- Units
- Use the area unit printed beside the field
- Save behavior
- Saves automatically in Property Data; wait for Auto-saved before moving on.
- Downstream effect
- Can feed price-per-SF, area, and occupancy figures.
Price or lease terms Optional
The asking price or lease terms for the selected package
- Format
- Currency or rate in the field format shown
- Units
- Use the currency or rent basis printed beside the field
- Save behavior
- Saves automatically in its section; wait for Auto-saved before reviewing pages.
- Downstream effect
- Can appear on document summaries and the public listing.
Calculated metrics Calculated
Values CREBuilder derives from source fields
- Format
- Not applicable
- Units
- Not applicable
- Save behavior
- No direct entry. The metric automatically recalculates after its price, area, rent, unit-count, or NOI source fields save.
- Downstream effect
- Generated document and listing metrics use the recalculated result; correct the inputs rather than the display.
Address
- Requirement
- Required
- What it means
- The property location used on the cover, maps, and listing
- Format
- Address selected from the search results
- Units
- Not applicable
- Save behavior
- Select the exact search result in Property Details; it saves with that section.
- Downstream effect
- Changing it can affect maps, demographics, and the public listing.
Property Name
- Requirement
- Optional
- What it means
- The marketing name used in headings and the public listing
- Format
- Plain text
- Units
- Not applicable
- Save behavior
- Saves automatically in Property Details. Portfolio documents use Portfolio Name, which some templates require.
- Downstream effect
- Changing it updates every page and listing that shows the name.
Building area
- Requirement
- Recommended
- What it means
- The property area in the unit shown for your property type
- Format
- Number in the property-type field
- Units
- Use the area unit printed beside the field
- Save behavior
- Saves automatically in Property Data; wait for Auto-saved before moving on.
- Downstream effect
- Can feed price-per-SF, area, and occupancy figures.
Price or lease terms
- Requirement
- Optional
- What it means
- The asking price or lease terms for the selected package
- Format
- Currency or rate in the field format shown
- Units
- Use the currency or rent basis printed beside the field
- Save behavior
- Saves automatically in its section; wait for Auto-saved before reviewing pages.
- Downstream effect
- Can appear on document summaries and the public listing.
Calculated metrics
- Requirement
- Calculated
- What it means
- Values CREBuilder derives from source fields
- Format
- Not applicable
- Units
- Not applicable
- Save behavior
- No direct entry. The metric automatically recalculates after its price, area, rent, unit-count, or NOI source fields save.
- Downstream effect
- Generated document and listing metrics use the recalculated result; correct the inputs rather than the display.
Required means the field is needed to complete or support this workflow. Some screens allow a draft to save before every required item is complete. The steps and troubleshooting call out controls the product actively blocks.
Troubleshooting and next steps
A value returns after it is changed.
Likely cause: The edited display may be calculated or sourced from another wizard section.
- Identify the owning source section.
- Change the source input and wait for the save state.
A section shown in another guide is absent.
Likely cause: Wizard sections vary by package, property type, template, and scope.
- Confirm the current document setup.
- Follow only the sections displayed for this document.
Final verification
- The correct document and building were edited
- Units match the field label
- The footer shows Auto-saved
- Review & Customize shows the expected value
- Related totals or narrative remain consistent
- No blocking warning, failed status, or unresolved validation message remains in the completed workflow.
Related tasks
Your next OM, done this afternoon
Turn your property facts, photos and financials into a polished, branded offering memorandum. Most brokers finish in 30 to 90 minutes.
No credit card required.