Outcome
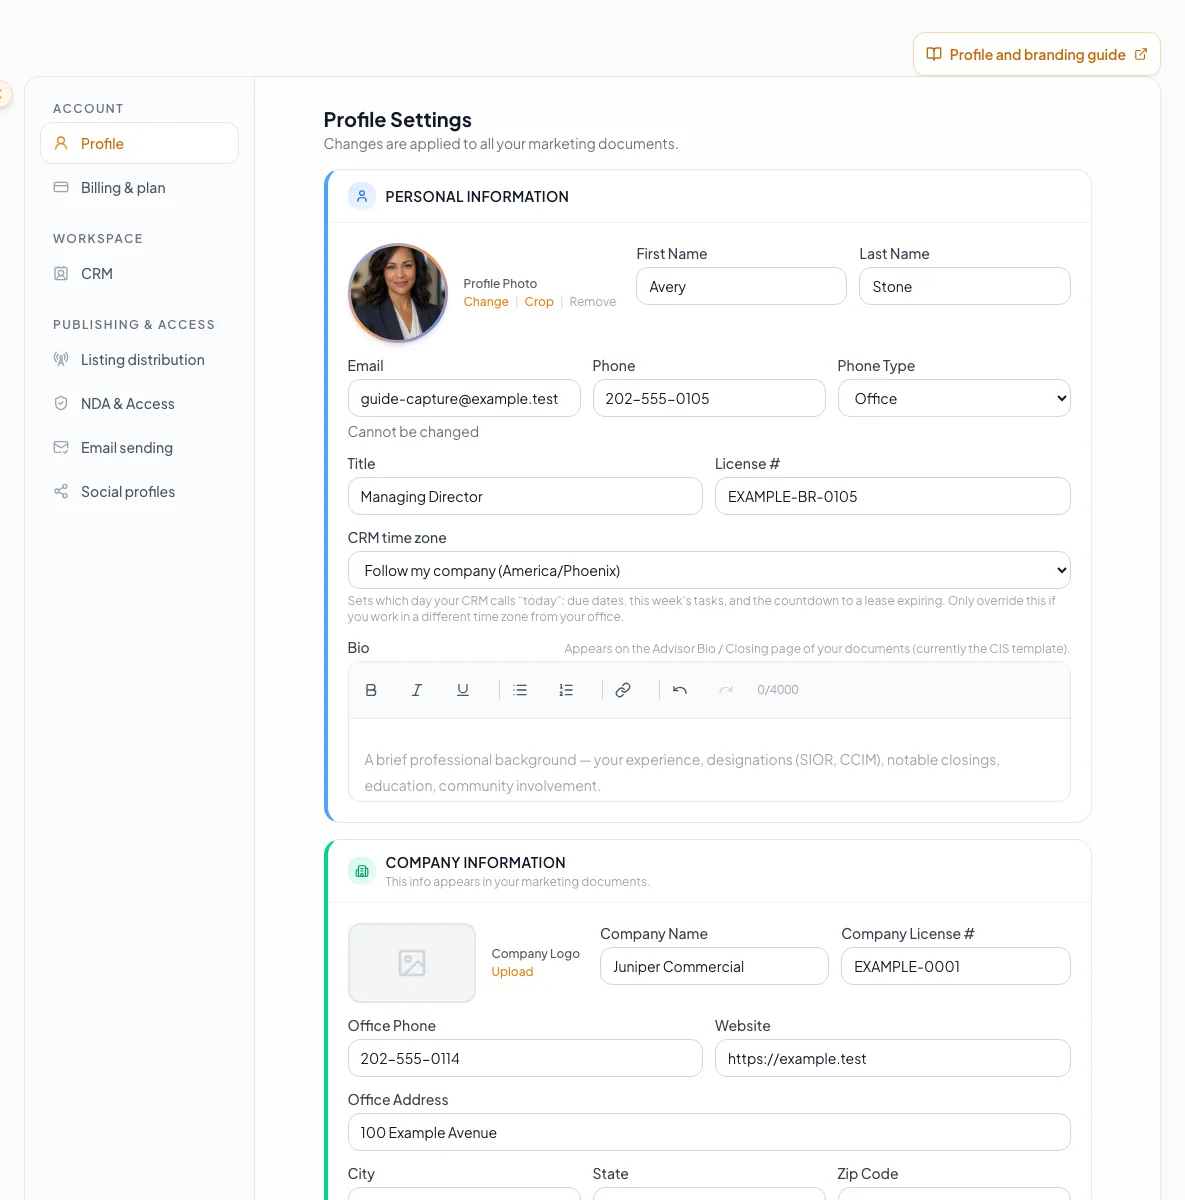
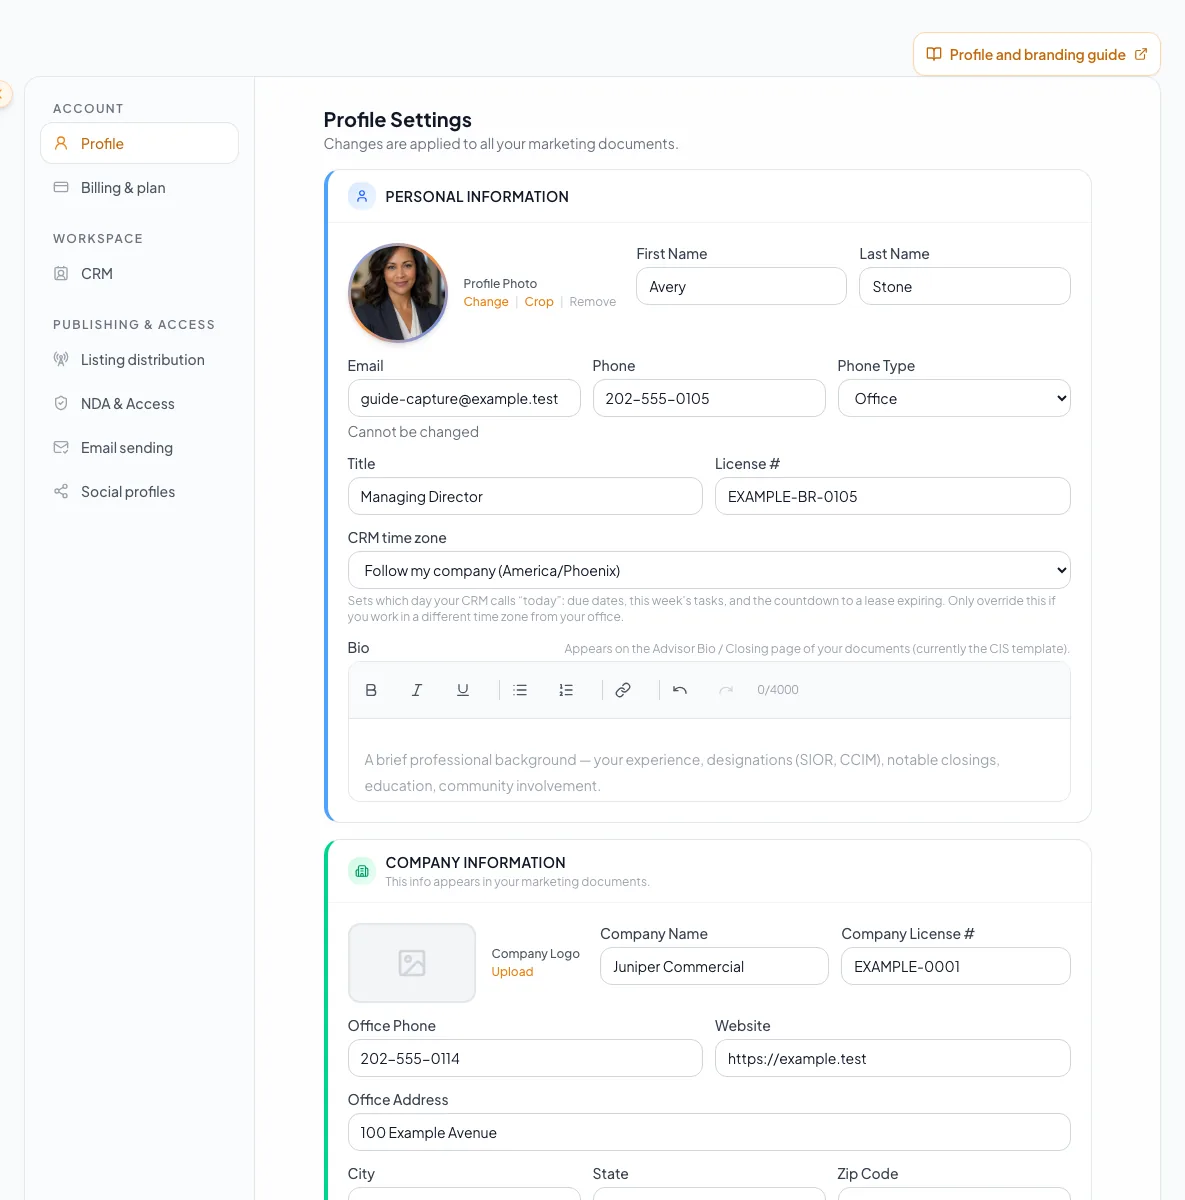
You will save accurate personal and company details, crop reusable brand images, verify downstream reuse, and understand the separate password and account-deletion controls.
Navigation path
Settings > Profile
Access
Every signed-in user can maintain personal details. Invited Regular Users and Coordinators on multi-member teams inherit company fields from the team administrator.
On this page
What you will accomplish
Goals
- Save reusable identity data
- Use correctly cropped brand assets
- Set the correct personal and office time zones
- Verify where profile data appears
Where saved profile data can appear
Treat Profile as a reusable source, then inspect important existing work after a change.
Saved Profile
Documents
Public listings
Email identity
Supported public profile
- Saved ProfileDocuments
- Saved ProfilePublic listings
- Saved ProfileEmail identity
- Saved ProfileSupported public profile
Before you start
Data, sources, and access to prepare
- A signed-in CREBuilder account
- Current broker and company details
- Permission to use the selected headshot and company logo
Prepare these details
- Use a clear square-friendly headshot
- Use a high-resolution logo with readable contrast
- Confirm license and company information
- Choose the time zone used for CRM due dates
- Save any unsaved work before changing a password or deleting an account
Complete the task
- 1
Open Profile settings
Settings
Select Profile.
Expected result: Personal Information and Company Information appear.
If this does not happen: Return to the signed-in workspace if Settings is unavailable.
- 2
Choose a profile photo
Profile > Personal Information > Profile Photo
Select one supported image file.
Expected result: The crop dialog opens with the selected headshot.
If this does not happen: Choose a JPG, PNG, GIF, or WebP file if the file picker rejects the image.
- 3
Position the profile crop
Crop Profile Photo dialog
Position the circular crop around the subject.
Expected result: The crop preview keeps the face clear and centered.
If this does not happen: Reset the crop if the face is clipped or too small.
- 4
Save the profile crop
Crop Profile Photo dialog
Select Save Changes once.
Expected result: The circular profile preview updates.
If this does not happen: Wait for the upload to finish before reopening Crop.
- 5
Enter personal details
Profile > Personal Information
Complete the current broker identity fields.
Expected result: Required name fields are valid and optional contact, title, license, and bio fields reflect the user.
If this does not happen: Correct the message beside any field before saving.
- 6
Choose the CRM time zone
Profile > Personal Information > CRM time zone
Select the time zone used for the user’s working day.
Expected result: CRM due dates and relative date labels use the intended zone.
If this does not happen: Choose the follow-company option when the office zone should govern.
- 7
Enter company details
Profile > Company Information
Complete the current company identity fields when they are editable.
Expected result: Company name, license, contact, address, and website data are ready to save.
If this does not happen: Ask the team administrator to update locked company fields.
- 8
Choose a company logo
Profile > Company Information > Company Logo
Select one authorized logo file.
Expected result: The crop dialog opens with the selected logo.
If this does not happen: Use an image with padding and contrast if the mark is unreadable in the preview.
- 9
Position the logo crop
Crop Company Logo dialog
Position the free-form crop around the complete mark.
Expected result: The crop preview excludes unintended surrounding space.
If this does not happen: Reset the crop if any part of the mark is removed.
- 10
Save the logo crop
Crop Company Logo dialog
Select Save Changes once.
Expected result: The rectangular logo preview updates.
If this does not happen: Wait for the upload to finish before reopening Crop.
- 11
Choose the office time zone
Profile > Company Information > Office time zone
Select the company’s operating time zone.
Expected result: Team members who follow the company zone use the intended office day.
If this does not happen: Confirm the office location with an administrator when multiple offices exist.
- 12
Save profile changes
Profile form
Select Save Changes once.
Expected result: CREBuilder confirms the saved profile and the form is no longer dirty.
If this does not happen: Resolve validation errors or retry after the save request finishes.
- 13
Inspect one downstream item
A representative existing document or listing
Open one important customer-facing item.
Expected result: The intended identity and branding are visible or the item clearly requires its own update.
If this does not happen: Refresh or edit the existing item explicitly when it retained a saved snapshot.
- 14
Enter the current password
Profile > Change Password
Type the current account password.
Expected result: The current-password field is complete.
If this does not happen: Use the account recovery workflow if the current password is unknown.
- 15
Enter a compliant new password
Profile > Change Password
Type the new password in both new-password fields.
Expected result: Both values match and meet the displayed password rules.
If this does not happen: Use at least eight characters with uppercase, lowercase, and a number.
- 16
Submit the password change
Profile > Change Password
Select Change Password once.
Expected result: A Password updated confirmation appears.
If this does not happen: Do not repeat the request while it is processing.
- 17
Review the deletion warning
Profile > Delete Account
Expand Delete My Account only when permanent deletion is intended.
Expected result: The page displays the confirmation requirements and consequences.
If this does not happen: Close the panel without entering credentials if access should be retained.
Profile-field and security reference
Important fields
| Field | Requirement | What it means | Format | Units | Save behavior | Downstream effect |
|---|---|---|---|---|---|---|
| First name and last name | Required | Required user identity | Plain text | Not applicable | Stored when Profile Save Changes succeeds. | Labels the account and reusable broker identity. |
| Phone, title, license, and bio | Recommended | Professional contact and credential details | Formatted phone plus plain-text professional details | Not applicable | Stored when Profile Save Changes succeeds. | Can supply contact, credential, and biography content to supported documents, listings, and public identity surfaces. |
| CRM time zone | Recommended | The user’s effective working day | Selected time-zone option | Not applicable | Stored when Profile Save Changes succeeds. | Controls CRM due-date grouping, Today labels, and lease-countdown context for the user. |
| Company details and logo | Recommended | Shared brokerage identity | Plain text plus approved uploaded logo | Not applicable | An authorized user stores changes with Profile Save Changes after any logo upload completes. | Supplies shared brokerage identity and can remain locked for invited members on a team. |
| Office time zone | Recommended | Default company operating zone | Selected time-zone option | Not applicable | An authorized user stores the company default with Profile Save Changes. | Provides the effective zone for team members configured to follow the company setting. |
| New password | Optional | Account sign-in secret | At least 8 characters with uppercase, lowercase, and a number | Characters | Stored only when Change Password succeeds; Profile Save Changes does not submit it. | Replaces the credential used for subsequent account sign-in. |
Required means the field is needed to complete or support this workflow. Some screens allow a draft to save before every required item is complete. The steps and troubleshooting call out controls the product actively blocks.
Account deletion is permanent
Deletion requires the signed-in email and password. Complete it only after exporting needed records and confirming the account should not be retained. This guide intentionally stops before the final destructive confirmation.
Verify before you finish
- The saved name is correct
- The headshot and logo are not clipped
- Personal and office time zones are intentional
- Locked company fields are owned by the correct administrator
- A representative downstream item was inspected
- Password or deletion controls were used only when intended
Troubleshooting and next steps
Company fields cannot be edited.
Likely cause: An invited Regular User or Coordinator on a multi-member team inherits company details.
- Ask the team administrator to make the company-wide change.
- Update only the personal fields available to the signed-in user.
A saved logo or photo looks wrong.
Likely cause: The crop may exclude part of the image or the source may have low contrast.
- Open Crop again.
- Choose a clearer source image when recropping cannot fix it.
An existing document still shows older contact data.
Likely cause: The document may contain a saved snapshot instead of reading the profile live.
- Open the document editor.
- Refresh or edit the affected identity content explicitly.
The password is rejected.
Likely cause: The current password may be wrong or the new password may not meet every rule.
- Confirm the current password.
- Use at least eight characters with uppercase, lowercase, and a number.
- Make both new-password entries identical.
Final verification
- Profile > Change Password: The current-password field is complete.
- Profile > Change Password: Both values match and meet the displayed password rules.
- Profile > Change Password: A Password updated confirmation appears.
- Profile > Delete Account: The page displays the confirmation requirements and consequences.
- No blocking warning, failed status, or unresolved validation message remains in the completed workflow.