Account & Settings Guide
Manage your profile, subscription, team members, and billing. Changes to your profile cascade to all marketing documents automatically.
Profile & Company Info
Settings → ProfileYour profile information appears on every marketing document you create. Changes made here automatically cascade to all existing and future documents, so you only need to update once.
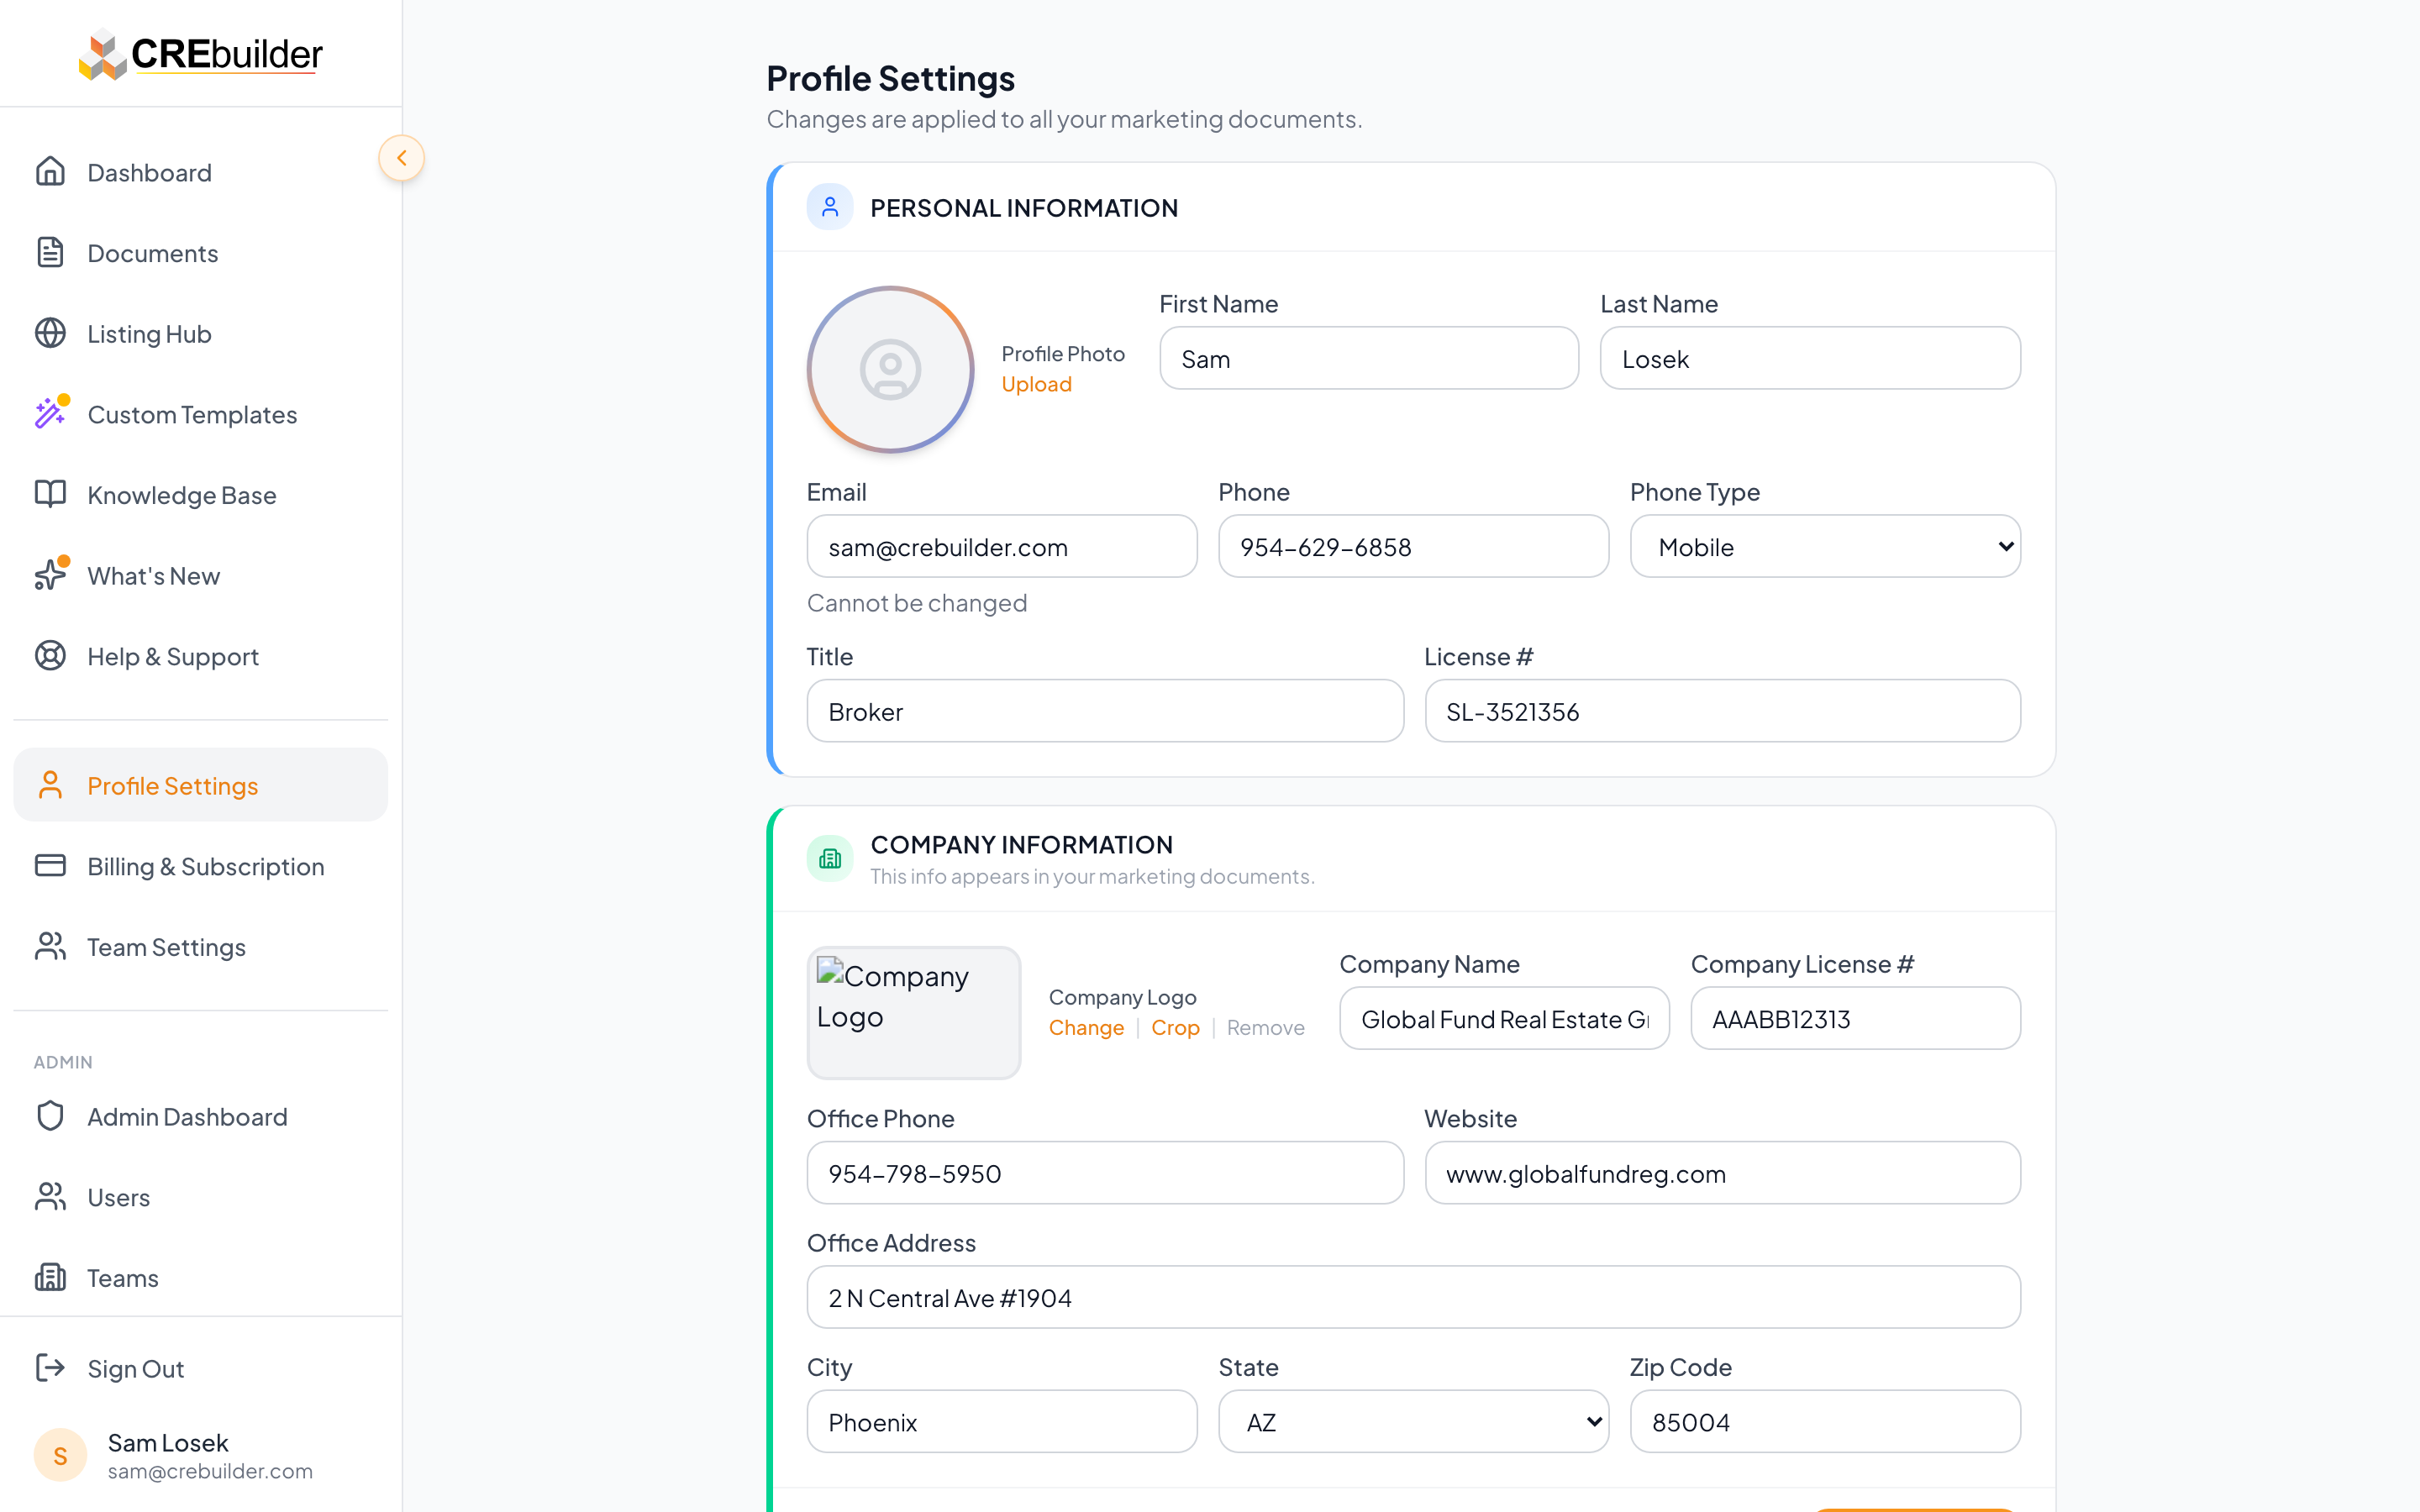
Personal Information
Appears on cover pages and contact pages of all documents.
Professional title (e.g., "Senior Vice President"). Shown alongside your name on documents.
Primary contact number. Specify Mobile, Office, or Home.
Set during registration. Cannot be changed (displayed but locked).
Your personal real estate license (e.g., DRE# 01234567). Appears on contact pages.
Company Information
Your brokerage or firm name. Displayed on cover pages, headers, and contact sections.
Brokerage license number (e.g., BRE# 01234567). Required in many states.
Company contact details shown on document contact pages.
Street address, city, state, and ZIP code for your brokerage office.
Profile Photo & Company Logo
Profile Photo
- Circular crop with gradient border
- Click to upload, then crop to fit
- Appears on document contact pages
- Supports JPEG, PNG, GIF, WebP
Company Logo
- Rectangular crop (free-form aspect ratio)
- Appears on cover pages, headers, and contact sections
- Upload, crop, change, or remove anytime
- Transparent PNGs render cleanly in PDF
Password & Account
Change your password from the profile page by entering your current password and choosing a new one (minimum 6 characters). Account deletion is available at the bottom of the page with email + password confirmation -- this permanently removes all documents and data.
Subscription Plans
Settings → BillingCREBuilder offers a free Starter plan and two Pro tiers. All plans include the full template library, all 10 property types, all 6 document types, and the complete editor. Pro plans unlock PDF export, unlimited documents, Listing Hub, and team features.
Starter
- Up to 3 documents
- All templates and themes
- Full editor with all features
- All 10 property types
- All 6 document types
Pro Monthly
- Unlimited documents
- PDF export (no watermark)
- CRE Listing Hub
- Branded retail maps
- Priority support
- Team management
Pro Annual
Save $240/yr- Everything in Pro Monthly
- Save $240/year vs monthly
- Annual billing at $828/year
- Same unlimited features
- Team seats at $38/mo (vs $49)
Team Seats (Pro Only)
Pro plans include 1 seat (the admin). Add additional seats for team members:
- Monthly plan: $49/month per additional seat
- Annual plan: $38/month per additional seat
- Coordinators: Free -- do not count toward paid seat limit
Starter vs. Pro Comparison
| Feature | Starter | Pro |
|---|---|---|
| Documents | Up to 3 | Unlimited |
| Templates & themes | All | All |
| Property types | All 10 | All 10 |
| Document types | All 6 | All 6 |
| Editor features | Full | Full |
| PDF export | -- | Yes |
| CRE Listing Hub | -- | Yes |
| Branded retail maps | -- | Yes |
| Team management | -- | Yes |
| Priority support | -- | Yes |
Team Management
Settings → Team (Pro only)Pro subscribers can invite team members to collaborate within a shared brokerage account. Team features include role-based access, document sharing, and company-wide branding defaults.
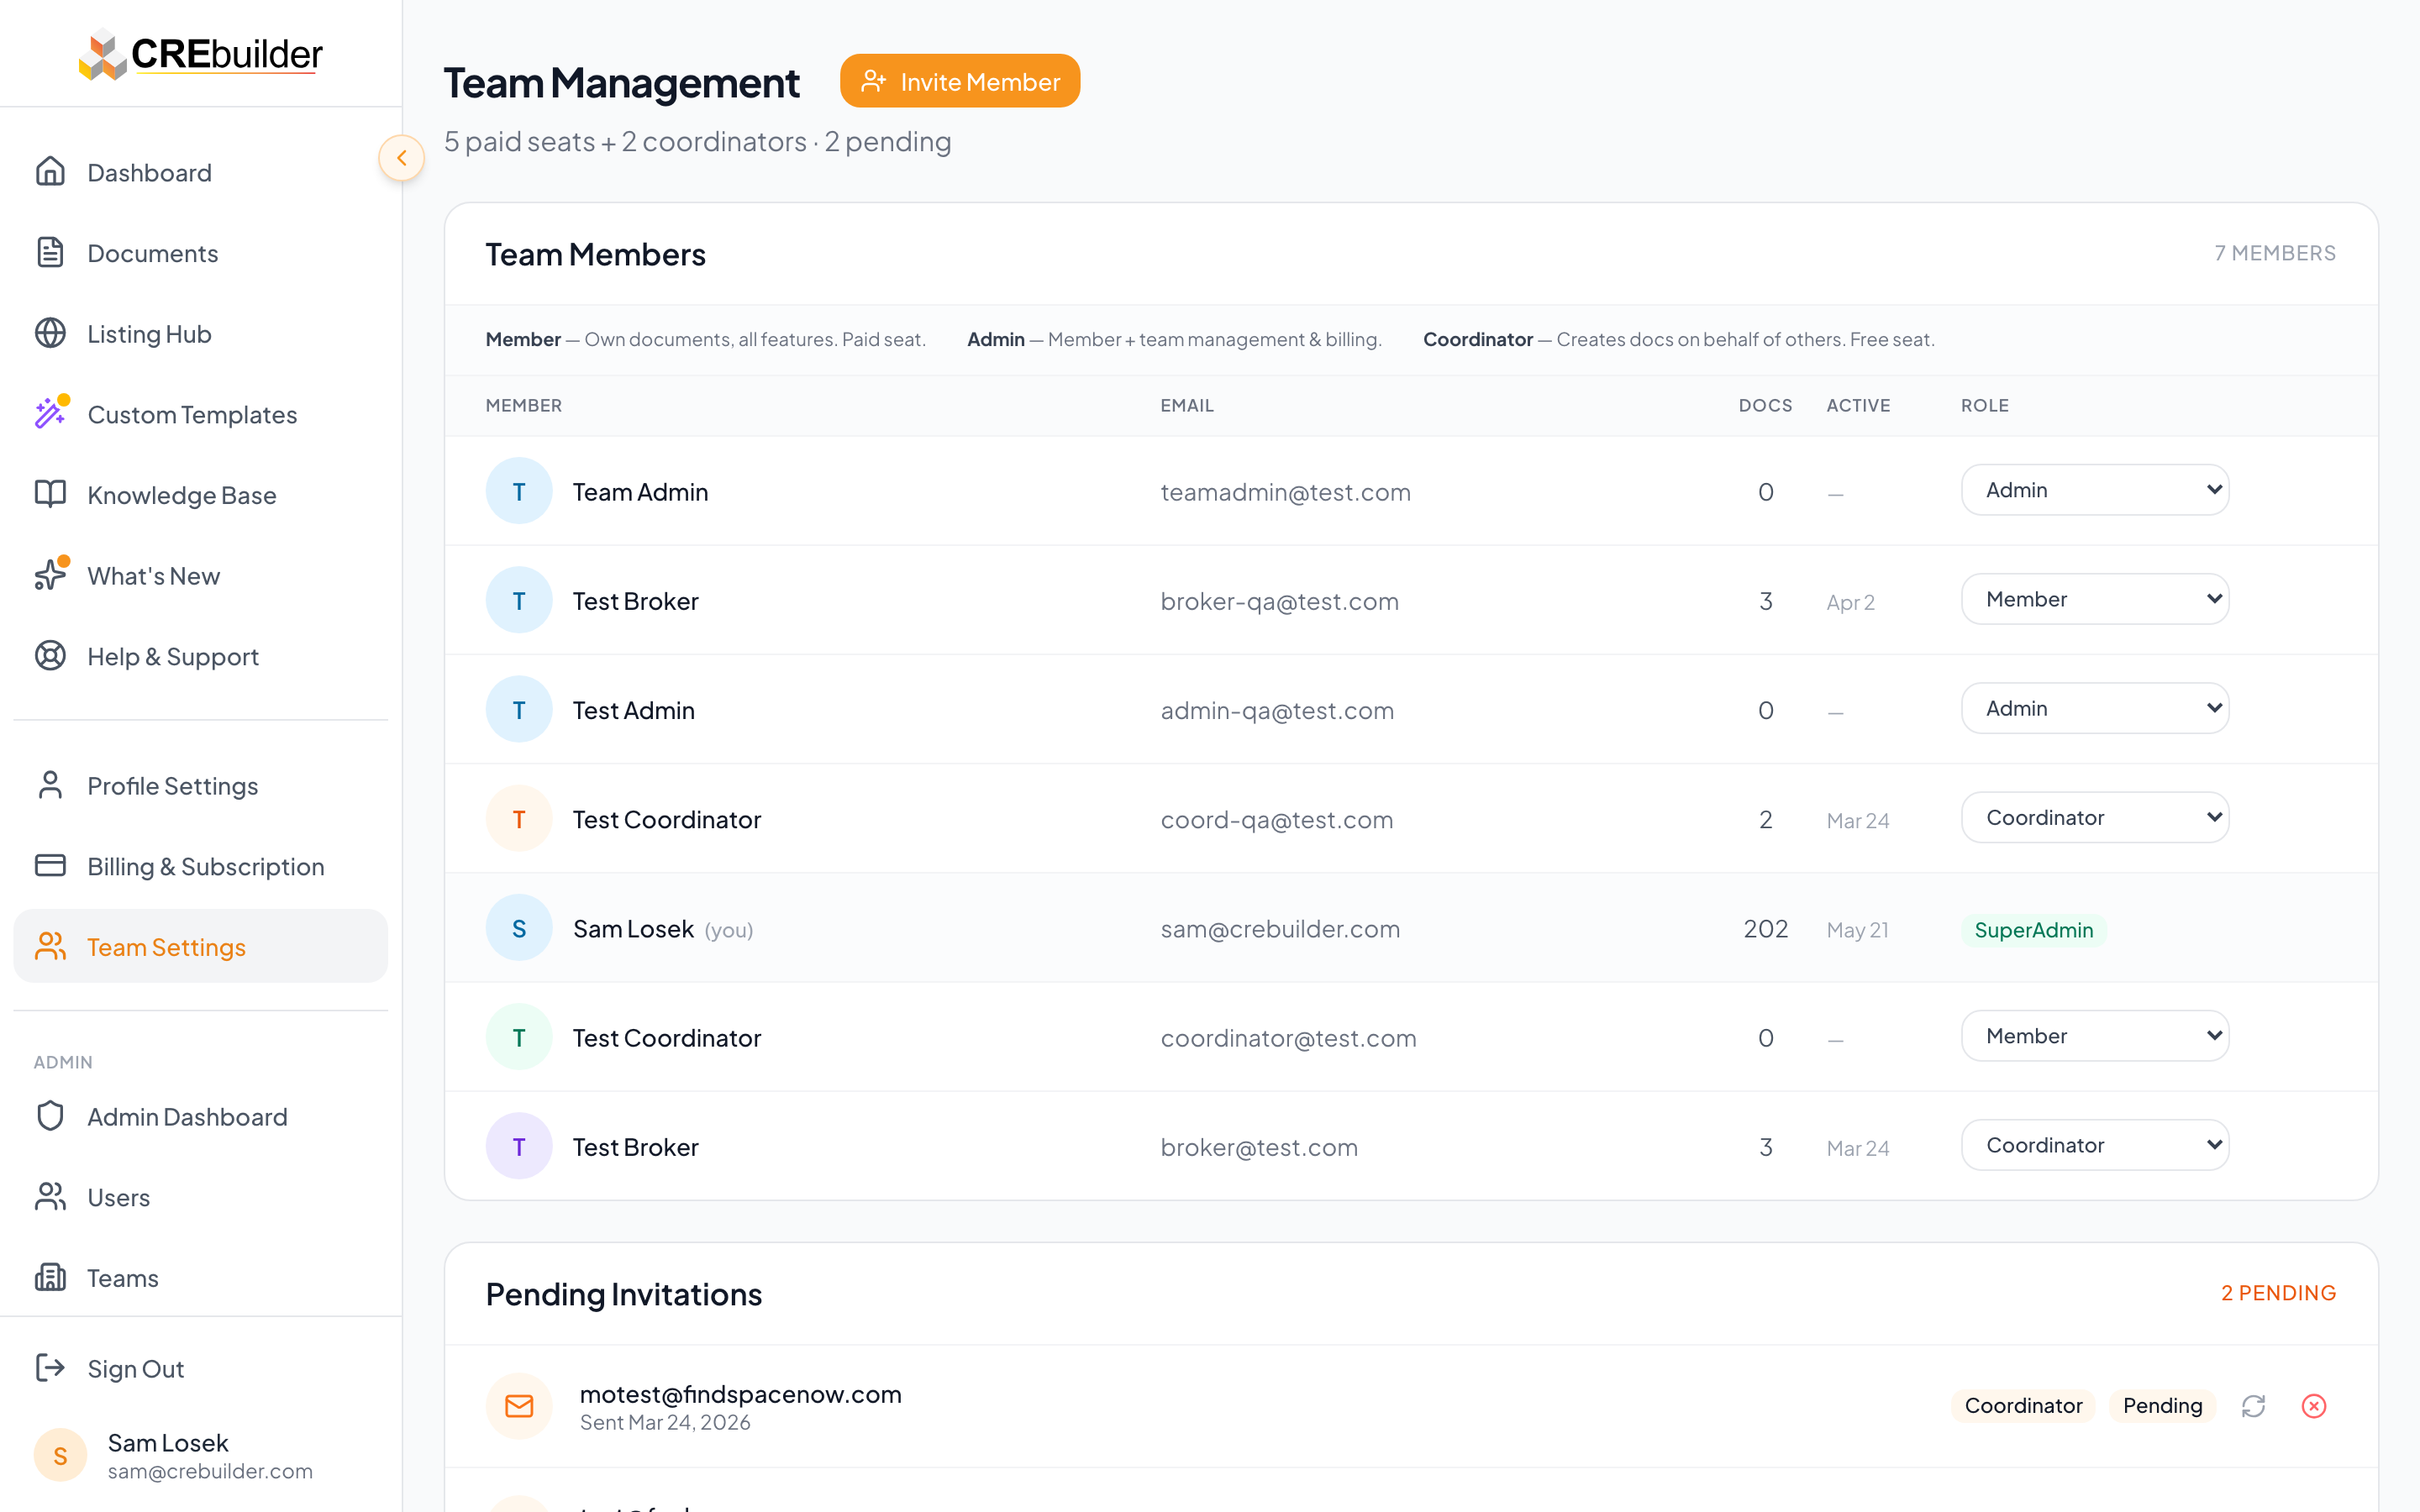
Inviting Team Members
- 1Navigate to Settings > Team
The team page shows all current members and pending invitations.
- 2Click "Invite Members"
Enter one or more email addresses. Each invitee receives an email with a sign-in / registration link. Invites no longer expire — the seat is paid the moment the invite is sent, and the invite stays valid until accepted or cancelled.
- 3Choose a role
Six roles exist: SuperAdmin, Admin, Brokerage Admin, Single Agent, Coordinator, and Regular User. New invites typically pick Brokerage Admin, Single Agent, or Coordinator. Only a SuperAdmin can change roles after the fact.
- 4Manage seats as needed
Add seats before inviting if your team is at capacity. Coordinators are free and do not use seats.
- 5Invitee accepts
If the invitee already has a CREBuilder account, they sign in to accept — no dead-end registration page. Their existing documents come with them when they join the team.
Team Roles
- View and manage all team documents
- Invite and remove team members
- Manage subscription and billing
- Set company-wide branding defaults
- Transfer document ownership
- Change member roles
- Create and manage own documents
- Access shared documents (if granted)
- Use all editor features and templates
- Cannot see other members' documents
- Cannot invite or remove members
- Company info managed by admin
- Create documents on behalf of brokers
- Free seat -- does not count toward paid limit
- Contact info never appears on documents
- Can share documents they created
- Cannot own documents directly
- Not a team admin
Company Branding Defaults
Admins can set company-wide defaults that automatically apply to all new documents created by any team member.
Primary color applied to headers, accents, and page elements for new documents.
The template theme pre-selected when team members create new documents.
Typography choice applied to new document body text.
Billing & Invoices
Settings → BillingThe Billing page shows your current plan, subscription status, payment method, team seats, and invoice history. Only team admins and solo users see billing controls -- regular team members see a read-only notice.
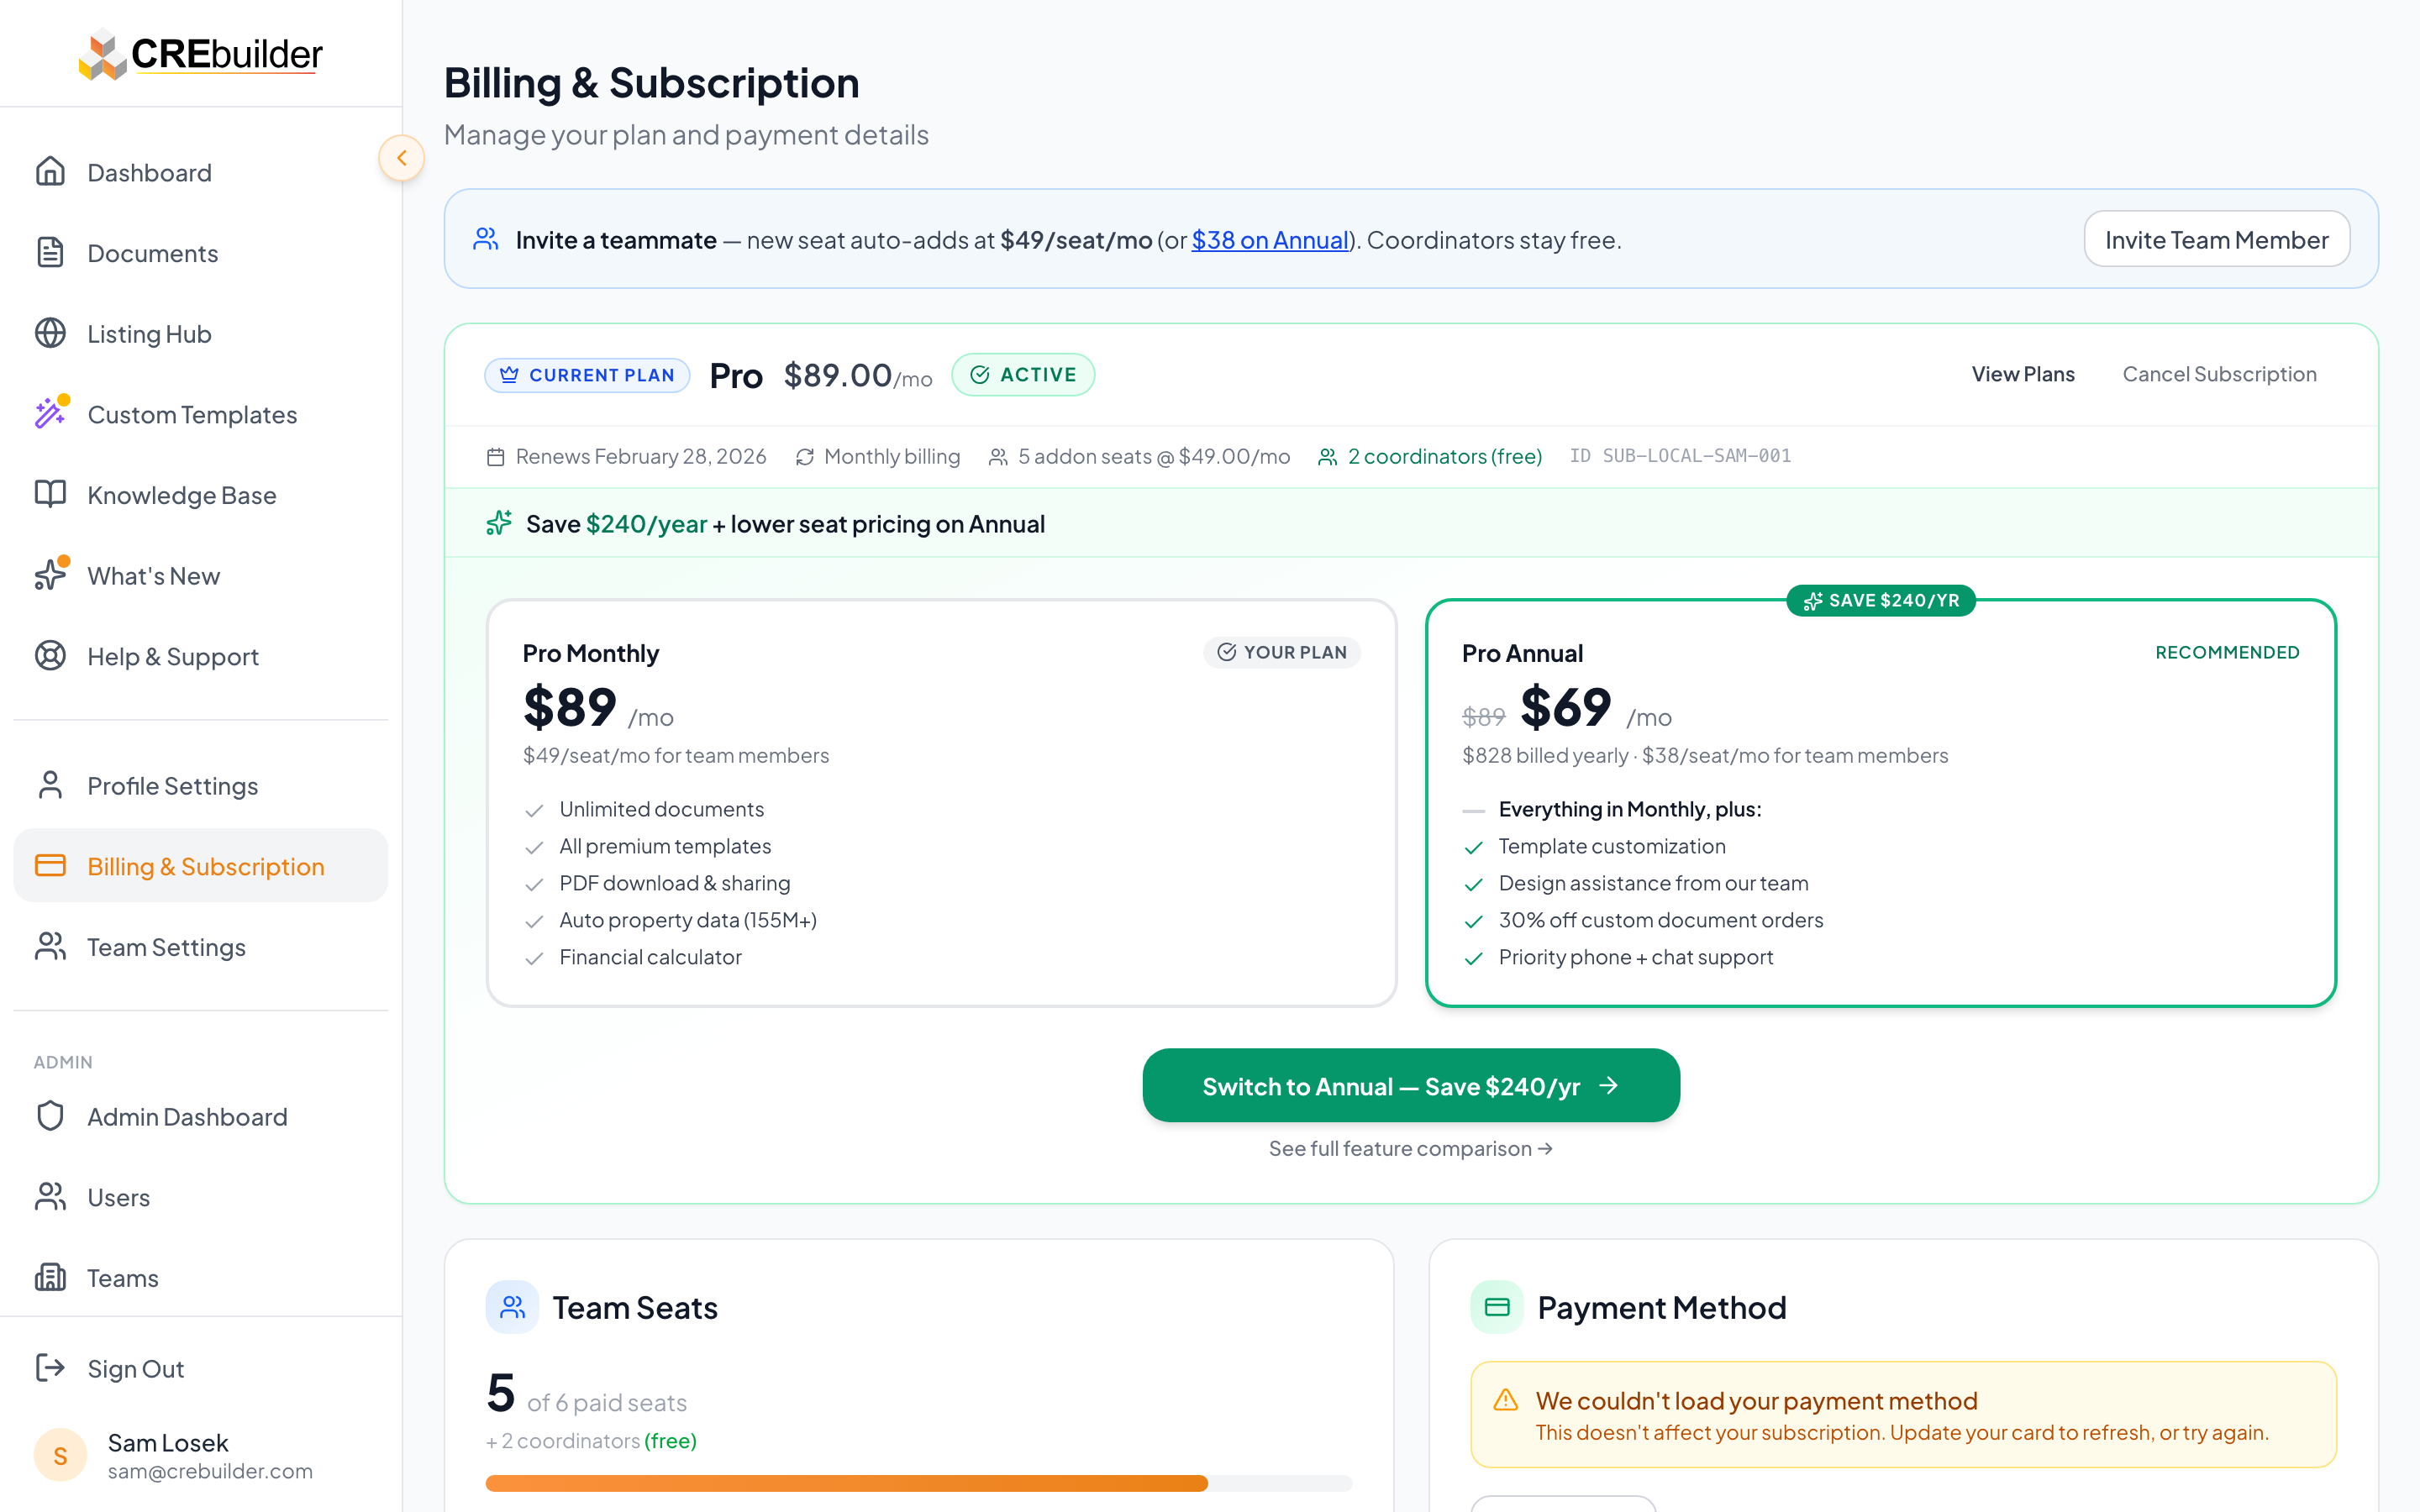
Subscription Status
Shows your plan name (Starter, Pro Monthly, Pro Annual) with a dark hero card and status badge.
Next renewal date and billing frequency (monthly or annual).
Visual bar showing used seats vs. total limit, plus coordinator count.
Active (green), Cancelling (amber), Cancelled (red), or Free (gray). There is no "Trial" status — the free Starter tier gives 3 documents to try the platform without a time limit.
Payment & Plan Actions
Opens Zoho secure portal to update your card on file.
Monthly users can switch to annual billing and save $240/year.
Compare plans and upgrade or change your subscription tier.
Download PDF invoices for any past billing period.
Cancellation & Reactivation
Type "cancel" to confirm. Access continues until the end of your current billing period.
All documents, photos, and financial data remain intact after cancellation.
One click to reactivate from the Billing page. Your data picks up where you left off.
After cancellation, you keep read access to all documents. PDF export and Listing Hub are paused.