Outcome
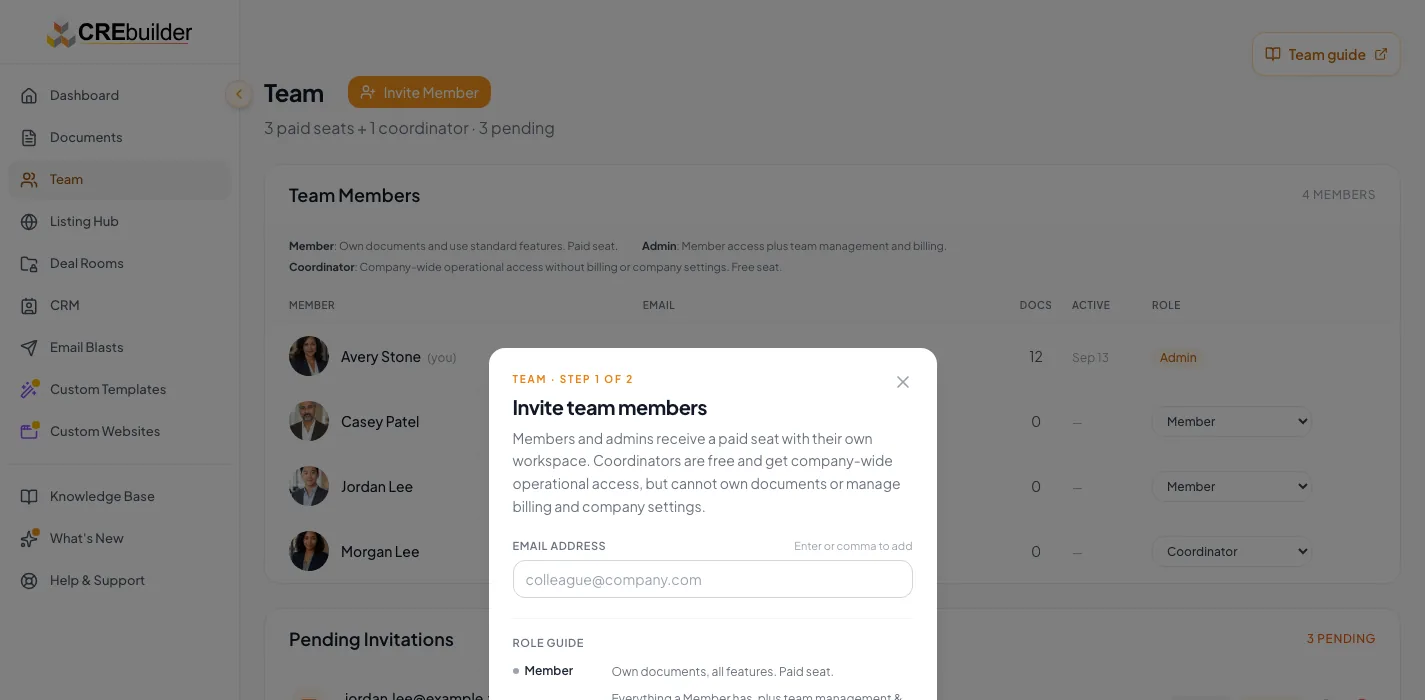
You will invite the correct people with least-privilege roles and understand the confirmed billing effect before the invitations are sent.
Navigation path
Team > Invite Member
Access
Team invitations require administrator permission. Member and Admin roles use paid seats; Coordinator is a free limited role. Live billing controls are authoritative.
On this page
What you will accomplish
Goals
- Choose the correct role
- Review seat and billing effects
- Send and verify invitations
Choose the least-privilege role
Role follows the work the person must perform, not seniority alone.
Required work
Member
Own documents and use standard features
Admin
Member plus team and billing management
Coordinator
Create documents on behalf of brokers
- Required workMember
- Required workAdmin
- Required workCoordinator
Before you start
Data, sources, and access to prepare
- Permission to manage the team
- Verified email addresses
- Authority for any paid-seat change
Prepare these details
- Confirm each email address
- Choose the work each person must perform
- Review current paid-seat capacity and pending paid invitations
- Obtain approval for any displayed billing change
Complete the task
- 1
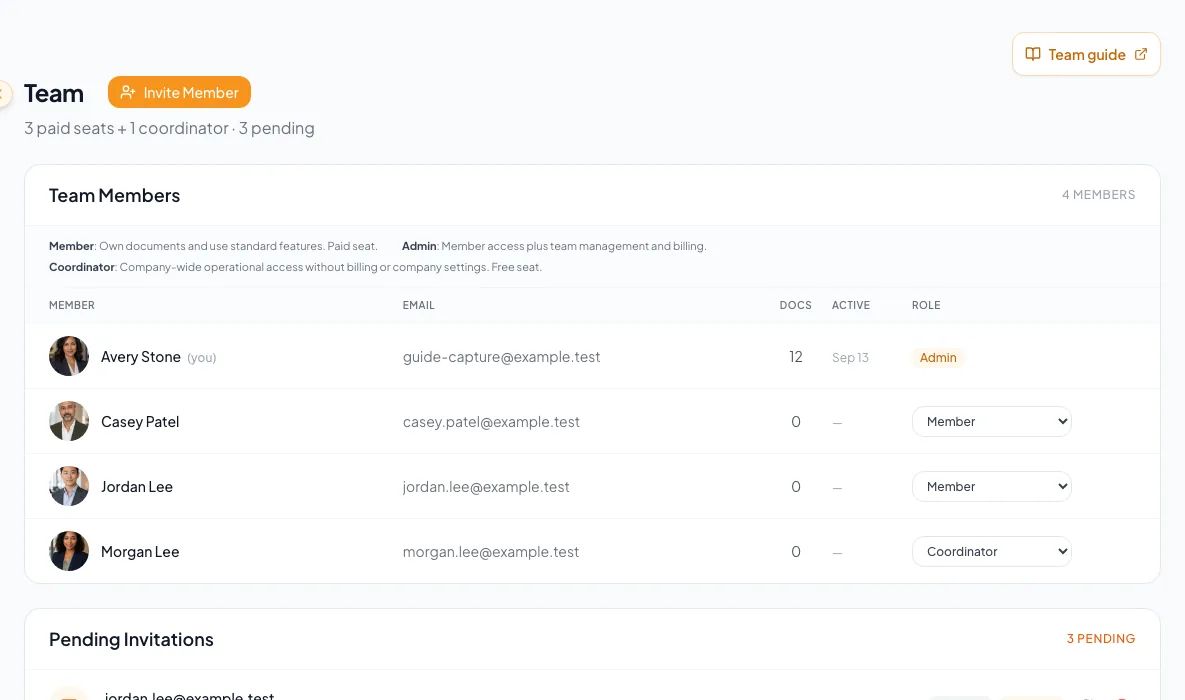
Open Team
Main navigation
Select Team.
Expected result: The member roster, seats, invitations, and permitted company controls load.
If this does not happen: Confirm administrator access if Invite Member is absent.
- 2
Open the invitation flow
Team
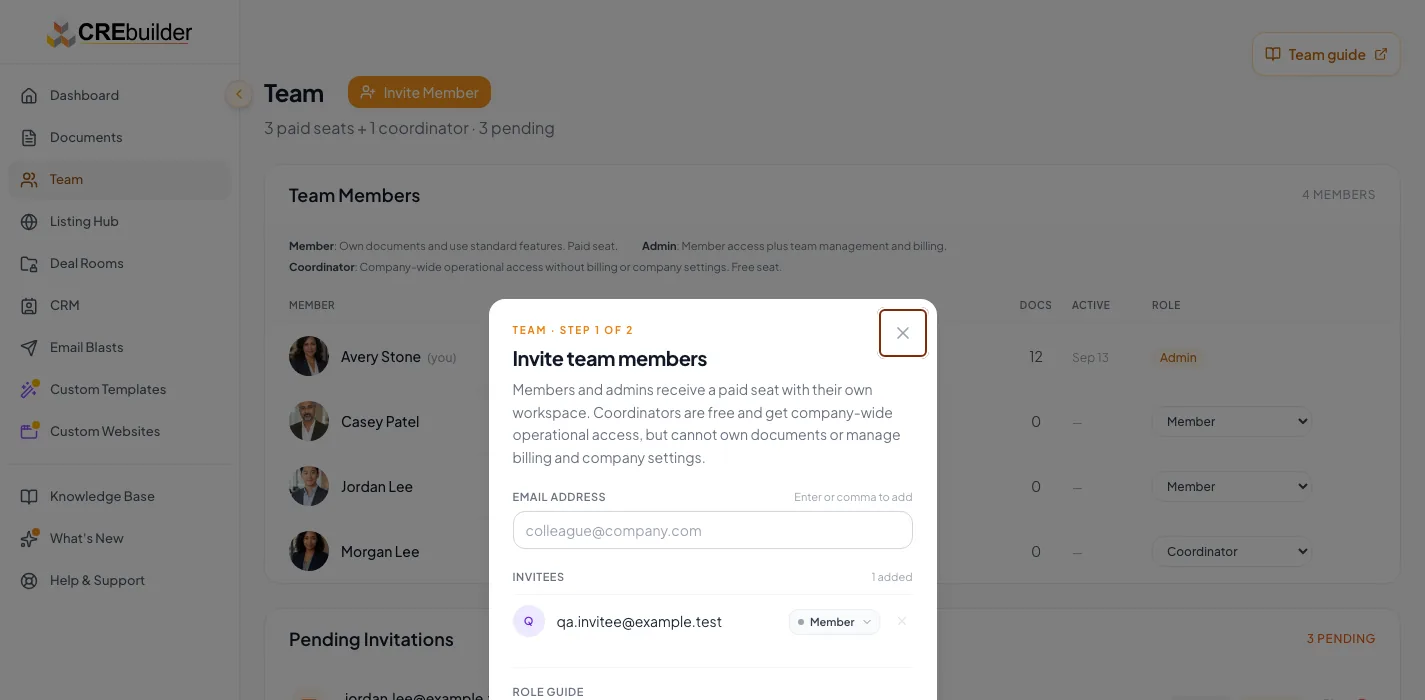
Select Invite Member.
Expected result: The invitation dialog opens at the email step.
If this does not happen: Resolve any displayed billing-maintenance restriction before continuing.
- 3
Add one email address
Invite Member > email
Enter one valid teammate email.
Expected result: The address appears in the invitee list.
If this does not happen: Correct duplicate, member, pending-invite, or format errors before proceeding.
- 4
Choose the role
Invite Member > invitee row
Select Member, Admin, or Coordinator for that email.
Expected result: The invitee row shows the intended role.
If this does not happen: Use Coordinator only for on-behalf document creation, not as a free substitute for a broker workspace.
- 5
Review the confirmation
Invite Member > Confirm
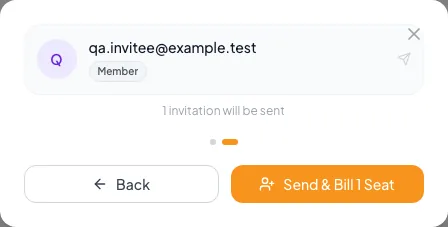
Select Next to open the confirmation.
Expected result: The dialog shows invite counts, roles, available seats, and any billing change.
If this does not happen: Return to the email step if the role or cost is not approved.
- 6
Send the invitations
Invite Member > Confirm
Select the final send action once.
Expected result: The results page reports which invitations succeeded or failed.
If this does not happen: Do not resend successful addresses when a mixed batch contains failures.
- 7
Close the result
Invite Member > Results
Select Done after recording failed addresses.
Expected result: Successful invitees appear in Pending Invitations.
If this does not happen: Retry only failed addresses after resolving their stated reason.
Role and seat reference
| Role | Primary capability | Seat type |
|---|---|---|
| Member | Own documents and use standard workspace features | Paid |
| Admin | Member access plus team management and billing | Paid |
| Coordinator | Create documents on behalf of brokers without an independent broker workspace | Free |
Verify before you finish
- Every invite email is correct
- Each role matches required work
- Displayed paid-seat impact was approved
- Successful invitations appear as pending
- Failed addresses were not assumed invited
Troubleshooting and next steps
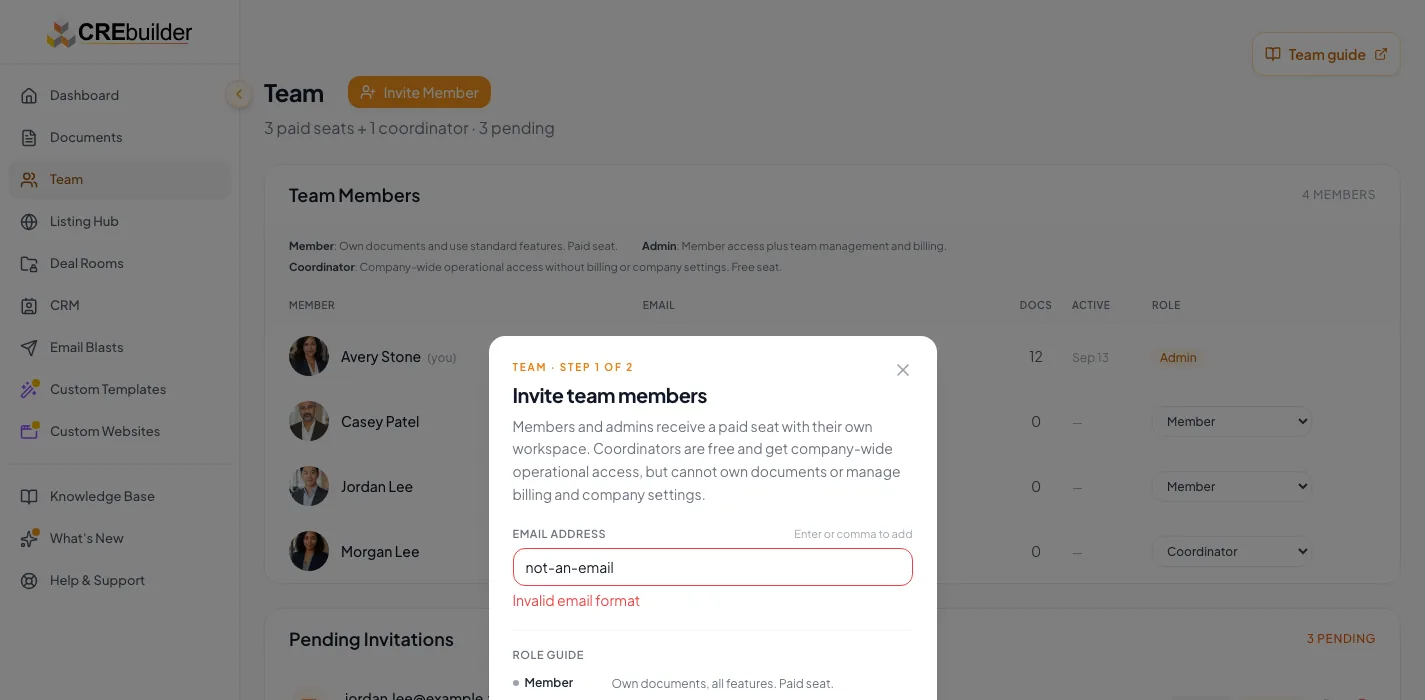
The email cannot be added.
Likely cause: It may be invalid, already a member, already pending, or already in the batch.
- Read the inline error.
- Correct the address or manage the existing member or invitation.
A paid invitation cannot be sent.
Likely cause: Seat billing may be under maintenance or the account may need additional capacity.
- Read the live Team billing message.
- Wait for billing availability or complete the approved seat action shown.
Final verification
- Invite Member > invitee row: The invitee row shows the intended role.
- Invite Member > Confirm: The dialog shows invite counts, roles, available seats, and any billing change.
- Invite Member > Confirm: The results page reports which invitations succeeded or failed.
- Invite Member > Results: Successful invitees appear in Pending Invitations.
- No blocking warning, failed status, or unresolved validation message remains in the completed workflow.