Outcome
Your property goes live on your CREBuilder Listing Hub, reaches the partner networks you choose through Sync, and shows the right inventory status everywhere.
Navigation path
Listing Hub > Listings
Access
Listing Hub publishing and Sync require an active subscription. You can manage any listing you can edit.
On this page
What you will accomplish
Listing control relationship
Sync builds on Listed, while Status describes the inventory on its own.
Completed document
Listed on CREBuilder
Sync to partner networks
Public inventory Status
- Completed documentListed on CREBuilder
- Listed on CREBuilderSync to partner networksRequired first
- Listed on CREBuilderPublic inventory Status
Before you start
Data, sources, and access to prepare
- A completed property document
- Edit access to the listing
- A verified address and sale or lease transaction type
Prepare these details
- Complete the property document and address
- Confirm the sale or lease transaction type
- Choose the public Status
- Decide whether the seller has approved syndication
Complete the task
- 1
Open Listings
Listing Hub
Select Listings.
Expected result: Your listable documents appear.
If this step does not work
Confirm you are signed in to the right workspace if the property is missing.
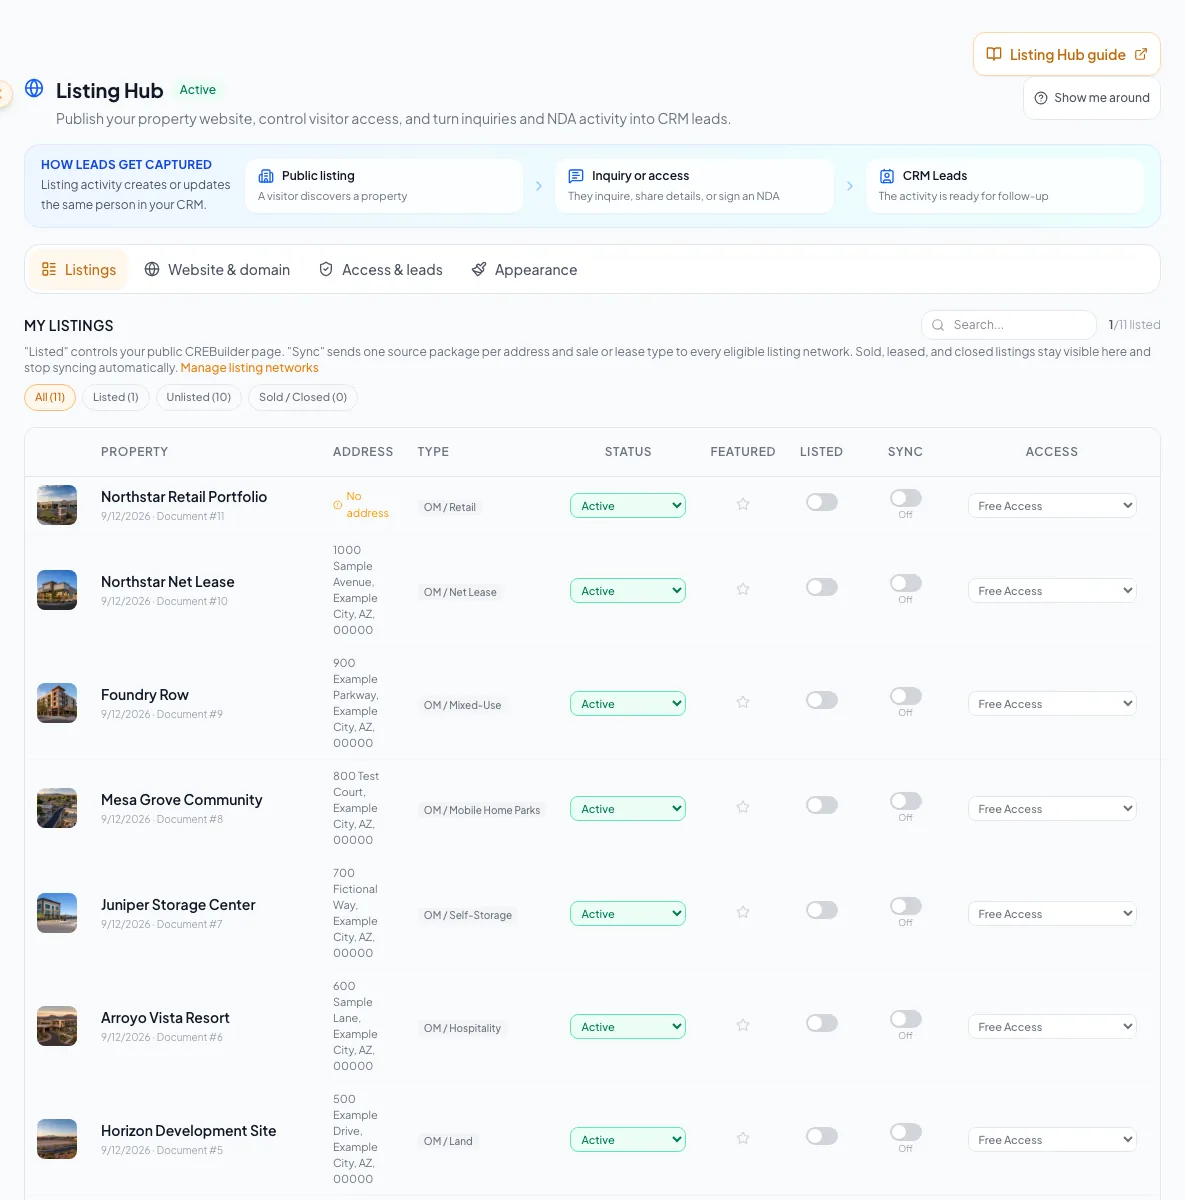
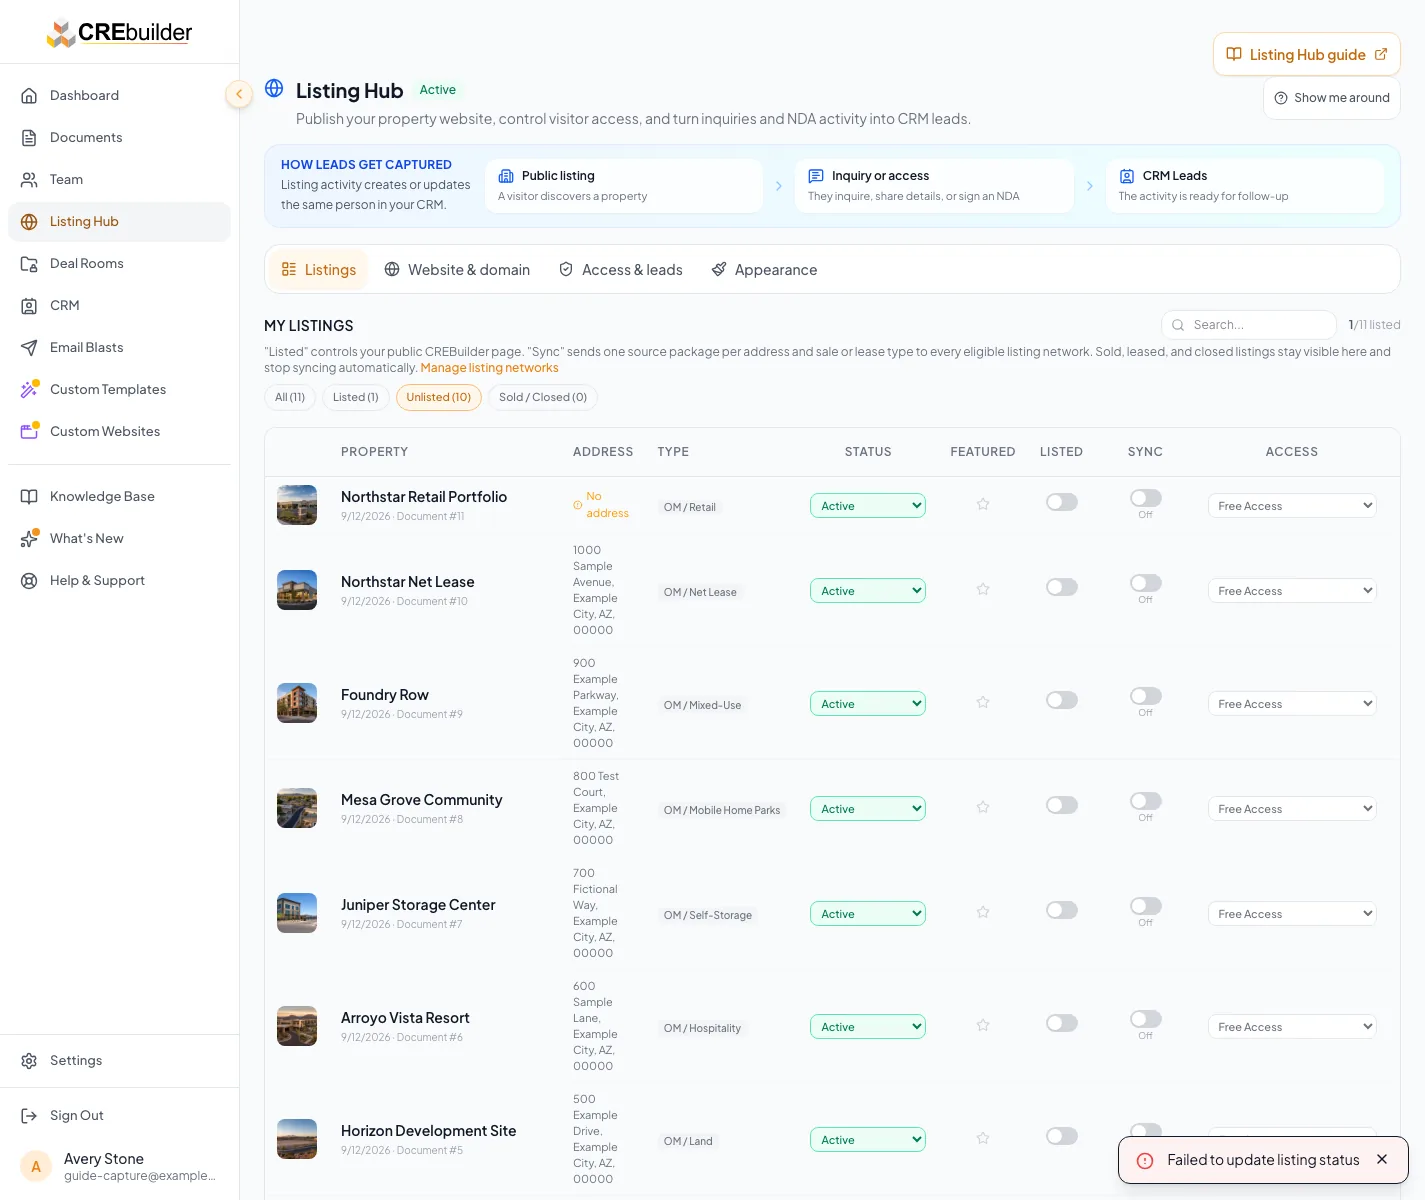
Use Listings, Website & domain, Access & leads and Appearance to manage your Listing Hub. - 2
Find the source document
Listing Hub > Listings
Search for the property row or mobile property card.
Expected result: The matching property and transaction type display.
If this step does not work
Compare the address, package, and document number when similar documents exist.
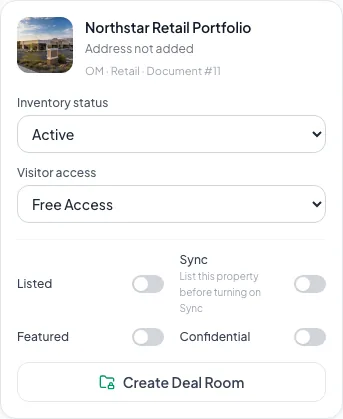
Use the property card controls to manage listings on a phone. - 3
Publish on CREBuilder
Listing row > Listed
Turn on Listed.
Expected result: The row shows the property is live on your Listing Hub.
If this step does not work
Fix any completeness message shown on the row, then try again.
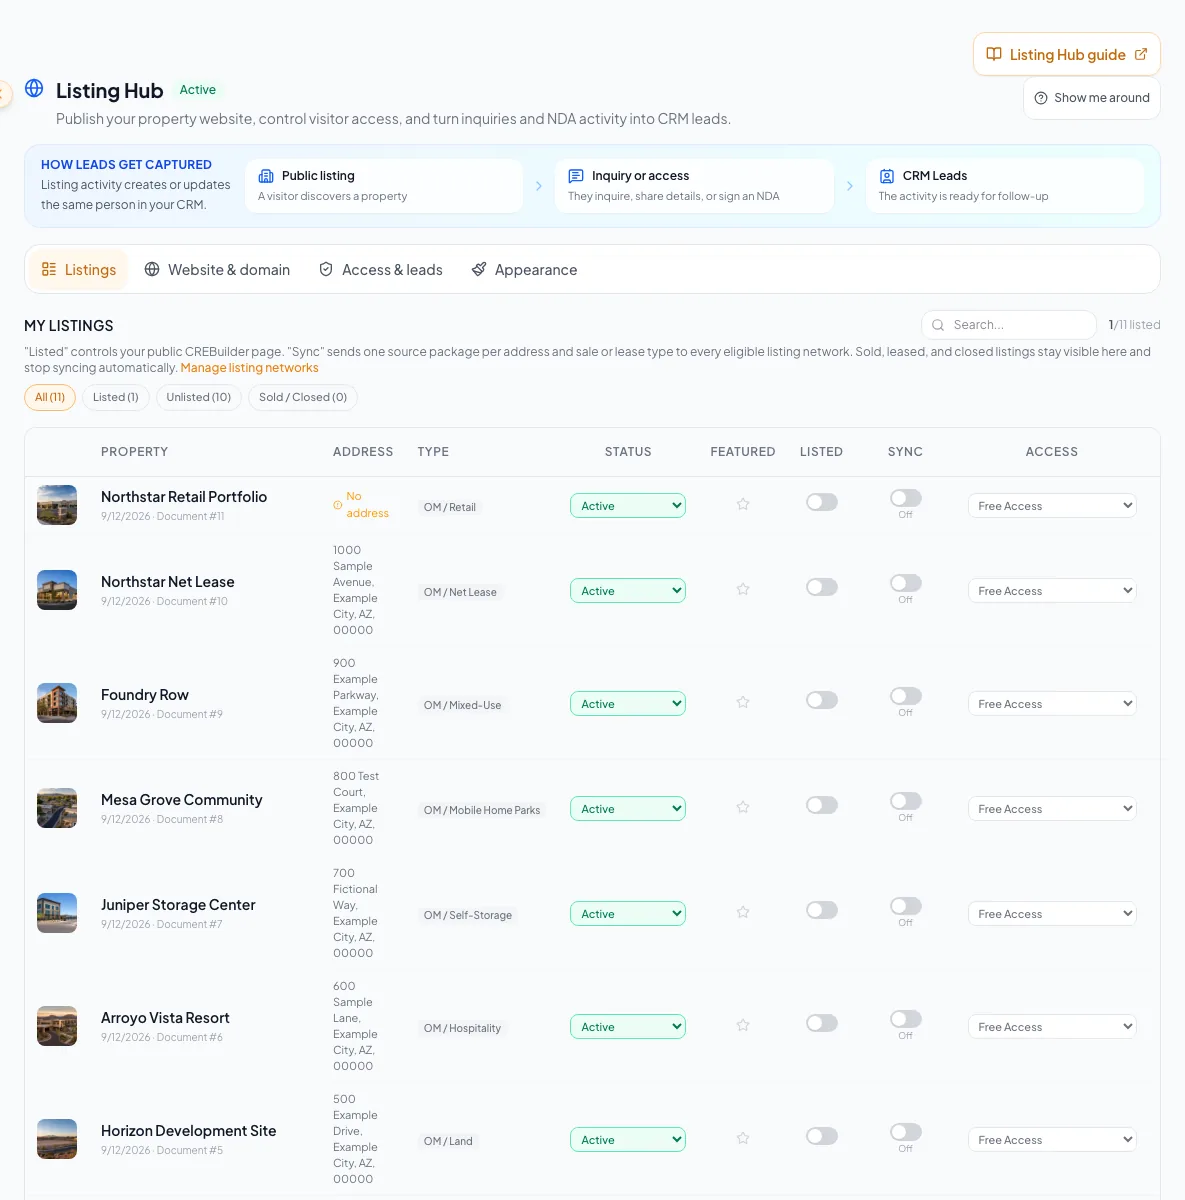
Check the listing publication status after updating it. - 4
Inspect the public page
Listing row > public preview
Open the public property page.
Expected result: The property page loads as visitors see it.
If this step does not work
Return to the source document to correct content before syndicating.
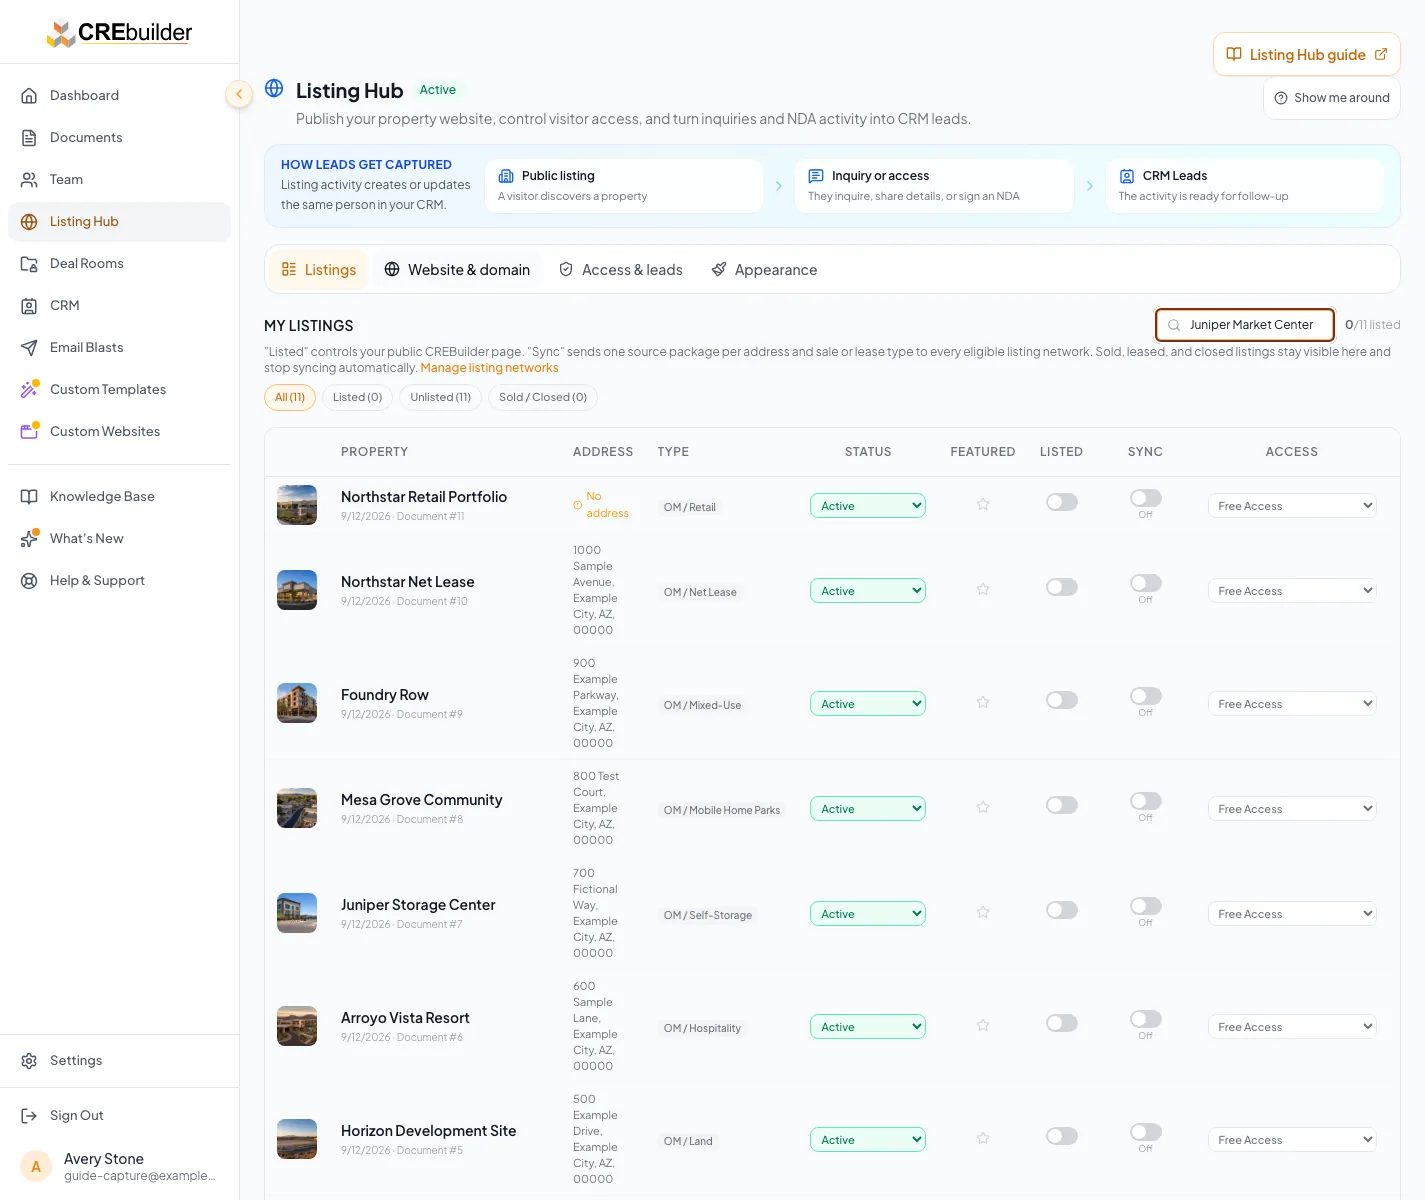
After you list the property, open its public page and confirm the photos, price and property facts buyers will see. - 5
Request external distribution
Listing row > Sync
Turn on Sync.
Expected result: A confirmation or eligibility message appears.
If this step does not work
Read any same-address replacement warning before confirming.
- 6
Set inventory status
Listing row > Status
Select the current inventory status.
Expected result: The row and public page show the selected status.
If this step does not work
Confirm the real-world transaction state before choosing Sold, Leased, or Closed.
- 7
Review processing state
Listing Hub > Listing sync
Open Listing sync.
Expected result: Each property shows its sync state and any blocking reason. Admins also see every network’s status and live listing count.
If this step does not work
Turn on Listed before Sync. Allow the network’s normal processing time before treating a pending result as failed.
Publication-control reference
Listed
- What it does
- Shows the property on your CREBuilder Listing Hub
- What it leaves alone
- Partner networks
Sync
- What it does
- Sends the listing to every partner network that accepts its transaction type
- What it leaves alone
- Listed (turn that on first)
Status
- What it does
- Labels the listing Active, Under Contract, Sold, Leased, or Closed
- What it leaves alone
- Whether an unlisted property is public
Featured star
- What it does
- Pins the property to the featured group at the top of your hub
- What it leaves alone
- Exact rank order within each group
LandSearch
- Listings it receives
- Sale listings, plus lease listings for land
- Current status
- Live
FindSpaceNow
- Listings it receives
- Lease listings
- Current status
- Live
CRE Traded
- Listings it receives
- Sale listings
- Current status
- Live
CREBrokerList
- Listings it receives
- Sale and lease listings
- Current status
- Coming soon
There is nothing to set up on the networks. CREBuilder manages the partner accounts and creates or updates your broker and company profiles from the listing contacts. Listing Hub > Listing sync shows each network’s current status; Settings > Listing sync shows the same overview.
Flyer labels do not change listing status
Cover Label in Review > Design > Cover Page changes only the flyer cover and newly generated PDFs. Typing Just Sold or Just Leased does not change Listed, Sync, Status, or public badges. To retire active inventory, set Status to Sold or Leased: the property stays on your hub as past inventory and Sync stops, so partner networks remove it after their next feed update. Returning to Active does not turn Sync back on automatically.
Featured and sorting
Use the Featured star to lift a property into the featured group at the top of your hub. Each group keeps the hub’s sort order.
Mobile controls are grouped by task
On mobile, each listing becomes a card. Inventory status and visitor access come first, followed by Listed, Sync, Featured, Confidential, and the Deal Room action.
Troubleshooting and next steps
Sync cannot be enabled.
Likely cause: The property may be unlisted, incomplete, duplicated by address and transaction, or a type no live network accepts.
- Turn on Listed first.
- Read the message on the row.
- Correct the source document or resolve the replacement choice.
The property is on your hub but not on a partner network.
Likely cause: Listed and Sync are separate, and networks process feeds on their own schedule.
- Confirm Sync is on.
- Check that the network accepts that transaction type.
- Review Listing sync again after the processing period.
Final verification
- The address and transaction match the intended property
- Listed is on
- Sync matches the seller’s syndication decision
- Status matches the current inventory state
- The public page looks right in a signed-out window
- No blocking warning, failed status, or unresolved validation message remains in the completed workflow.
Related tasks
Your next OM, done this afternoon
Turn your property facts, photos and financials into a polished, branded offering memorandum. Most brokers finish in 30 to 90 minutes.
No credit card required.