Outcome
You will add only necessary annotations, organize their layers, and produce a legible map at document-page size.
Navigation path
Document Wizard > Maps > Map Builder > Controls
Access
Available inside the embedded Map Builder. Some controls collapse on narrower viewports.
On this page
What you will accomplish
Goals
- Add a purposeful annotation
- Control layer order and visual hierarchy
- Apply a readable base-map style
Recommended visual hierarchy
The subject stays primary while annotations explain rather than cover the geography.
Subject property
Strongest identifier
Key anchors
A small number of verified places
Supporting labels
Only needed explanations
Base geography
Roads, areas, and context
- Subject propertyKey anchors
- Key anchorsSupporting labels
- Supporting labelsBase geography
Before you start
Data, sources, and access to prepare
- An open map with a verified subject marker
- Approved graphics for any uploaded image or logo
Prepare these details
- Choose approved image and logo files
- Write labels before adding them
- Decide whether a shape explains an area, boundary, route, or radius
- Choose colors with enough contrast against the base map
Complete the task
- 1
Choose one tool
Map Builder > Map tools or visible controls
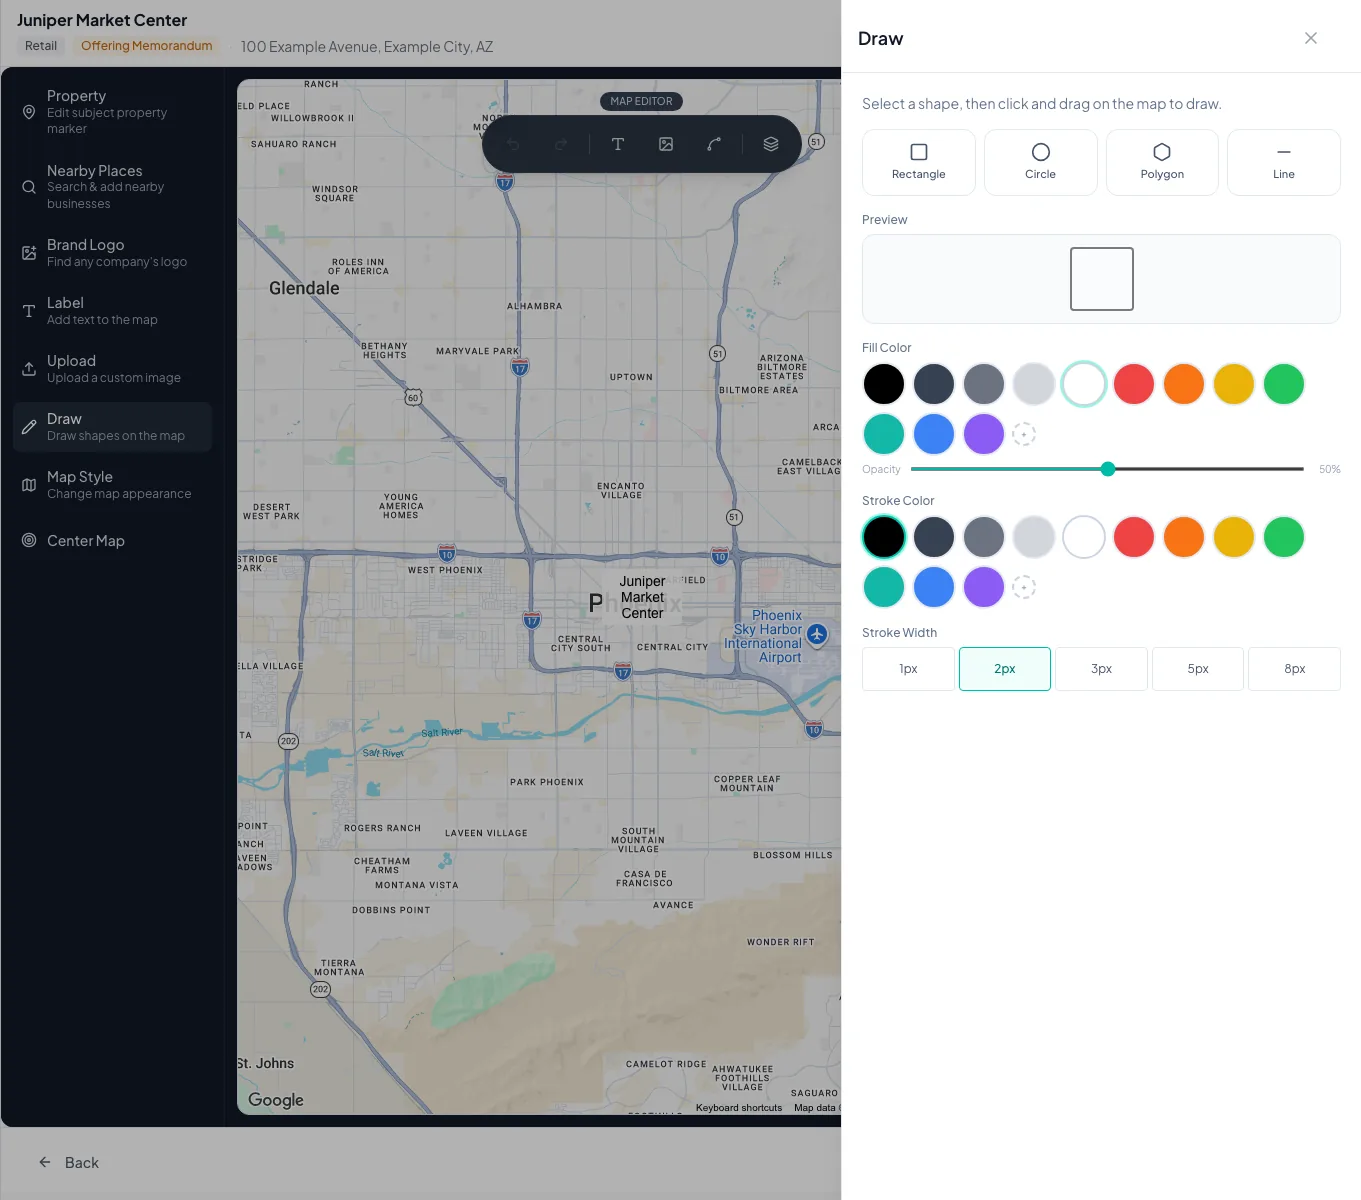
Select Brand Logo, Label, Upload, or Draw.
Expected result: The selected tool panel or dialog opens.
If this does not happen: Select Map tools if the tool list is collapsed.
- 2
Create one overlay
Selected tool panel
Complete the one add action for the intended overlay.
Expected result: The new overlay appears on the map.
If this does not happen: Delete it immediately if the source or content is wrong.
- 3
Move the overlay
Map canvas
Drag the overlay to its intended display position.
Expected result: The overlay no longer hides the subject or key road context.
If this does not happen: Use Center Map if panning has made orientation unclear.
- 4
Edit the overlay style
Overlay edit control
Apply one readable container, text, fill, or stroke style.
Expected result: The annotation remains legible against the map.
If this does not happen: Increase contrast or simplify the style when it blends into the base.
- 5
Review Layers
Map Builder toolbar > Layers
Open Layers.
Expected result: Text labels, business logos, images, and shapes are listed by type.
If this does not happen: Remove an unintended duplicate from the layers list.
- 6
Set leader-line behavior
Map Builder toolbar > Leader Lines
Choose the leader-line visibility or style needed for displaced logos.
Expected result: Logo-to-location relationships remain understandable.
If this does not happen: Return logos closer to their locations if lines cross excessively.
- 7
Choose the base style
Map Builder > Map Style
Select one base style.
Expected result: The map background changes while overlays remain visible.
If this does not happen: Return to Default or Light if roads and labels lose clarity.
Editor-control reference
| Control | Use |
|---|---|
| Brand Logo | Search for a company mark or upload an approved alternative |
| Label | Add short explanatory text |
| Upload | Place an approved custom image or symbol |
| Draw | Add a rectangle, circle, polygon, or line |
| Layers | Find and manage existing overlays |
| Leader Lines | Connect displaced business logos to mapped locations |
| Map Style | Set base style, map-label visibility, and optional highway emphasis |
Verify before you finish
- The subject marker remains the strongest element
- Every annotation adds useful information
- Leader lines point clearly to their locations
- Roads and essential labels remain visible
- The map works at final page size
Troubleshooting and next steps
An overlay cannot be found.
Likely cause: It may be outside the current viewport or hidden among layers.
- Open Layers to locate the overlay type.
- Use Center Map and then reposition or remove it.
Labels are readable in the editor but not in the PDF.
Likely cause: They are too small or low-contrast at final page scale.
- Increase text size or contrast.
- Remove lower-priority labels.
- Recheck the saved map in Review & Customize.
Final verification
- Overlay edit control: The annotation remains legible against the map.
- Map Builder toolbar > Layers: Text labels, business logos, images, and shapes are listed by type.
- Map Builder toolbar > Leader Lines: Logo-to-location relationships remain understandable.
- Map Builder > Map Style: The map background changes while overlays remain visible.
- No blocking warning, failed status, or unresolved validation message remains in the completed workflow.